Thursday 29 November 2012

They'll make it overseas!

Finally got my overseas prototype to fit through the acrylic slot tester at the post office. Yay! Here is the finished card. I did have to pull the stamen off and redo it with ordinary kraft card stock.

Here is a close up of that poinsettia made with the Tim Horton coffee sleeves. This shot shows how much I loaded up on the stickles! It is Christmas after all.
As the stickles dried, they made the pointed edges of the petals separate from the backing of the sleeve and sort of curt upwards ever so slightly. At first I thought I had ruined them, but then I grew to love it as it adds extra depth.  When I tilted the card to show the sparkle, it made the poinsettia look all washed out. In real life, the red of the poinsettia does match the patterned background paper. The stamped "Merry" however,  is a slightly different red...(


 I have ten base cards made up with the two strips of patterned paper already attached and the Merry square stamped, die punched and assembled onto the cards already.  I used an assortment of colours from this patterned paper line .I just need to sort the poinsettia depth problem and I can get them all finished off tomorrow.
I kept the inside quite plain. Just stamped the sentiment straight to the card. I am amazed that I got it level! Whew!


Just need to roll off the poinsettias and have a field day chalking 50 little pieces of coffee sleeves...a job I can almost predict will end in me losing one tiny piece! I think I will cut and chalk one extra set just to be sure. Then I will have it ready to throw together for an emergency card.
Recipe
Card base - 1/2 sheet of 8 1/2 x 11 cardstock from my stash
Design  paper - 2 strips from my stash (originally from a patterned paper pad)
Card stock - snippets from my stash
Stamp - Stampin' Up
Dies - Spellbinder Poinsettia,
Punch - Martha Stewart
Flower - poinsettia cut from Tim Hortons coffe sleeves
Ink - Memento red, brown; edges inked with Chalk ink chestnut roan

I am entering this card in the following challenges:
1. Pixies Crafty Workshop - Must use snippets- All the pieces on this card are snippets. The patterned paper is leftover from previous years cards. The poinsettia is made from coffee sleeves. The Merry stamp was already done and assembled from previous years.
2. Stamping for Pleasure - Must be Christmas theme.
3.Little Clare's Designs  - Christmas
4.Hiding in My Craftroom - Christmas
5. Shopping Our Stash - #79 Odds and Ends - I will finallay be using up these card bases with the two strips of patterned paper already affixed. They have been in the cupboard for over a year. They were the base for a previous years card and this will be using up the last of them.
6.  Lexie's Creations - Christmas
7. The Paper Girls  - Xmas or Winter
8. Scrap-Creations -  Merry Christmas
9. Tuesday Throwdown - Lots of layers -The poinsettia has 5 layers inclusive of the leaves.
10.Forever friends Glitter and Sparkle - The poinsettia is stickled from top to toe. The patterned paper is glittered,.
11.Sparkles Monthly Challenge  - Christmas is coming

Tuesday 27 November 2012

WOYWW 182 Keeping my fingers crossed it's .2

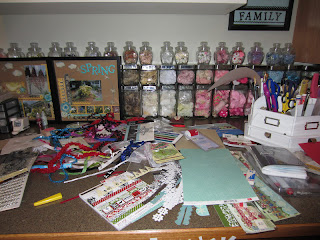
Here is a shot of my scary desk. Why am I showing you? Because it is  WOYWW Wednesday...the day we unveil the current state of our desks and reveal what we have been working on. To see more desks go  Julia's, and be sure to leave her some bloggy hugs for starting all of this for us.


As you can see,  I am still trying to get my Xmas cards finished up. The Dec 3rd international mailing date is fast approaching so I am trying to finish up the overseas cards.

I've been trying to create a card that can be posted overseas for regular international postage. The card over to the front left of my desk s is my first prototype, so I will take it to the post office tomorrow for the big test...it must slide through a thin little .2  slot in an acrylic ruler.
Of course you can't buy your own tester ruler...You have to drive up there, waste their time (and yours) only to go home and tear some elements from your card and start over.

I don't understand why you can't buy one of these postage "testers". Whenever I ask if they are available for purchase, I get a blank look. When I try to explain if I had my own, it would save me from wasting my time (and theirs) running up there to check on the width...they  just look at me as if  I am from Mars!
Now I do try to be frugal. Regular overseas postage is $1.80 and if possible I would like my card to fit this standard postage.  If if means 2 trips up there, so be it. So this is what I have come up with so far.

Yes, I know that this card is similar to the blue and kraft poinsettia card in my last post. That one had foam pop up dots between the poinsettia layers. Now I do know that 4 layers of pop dots will not make it through the infamous acrylic slot. So this time I put my love of Tim Horton's coffee to the test. I have 4 layers of Tim's coffee sleeves, rubbed with Stampin' Up green and red chalks. There is just a very thin glue dot circle between each layer. Oh gosh, I guess  the leaf makes a fifth layer. I think the layers might make it through but the center of the flower may have to be pried off and replaced with a new one made from a snippet of thinner kraft card stock. Another option would be to pry off the two poinsettia leaves and just leave the thin, fine cut, green leaves.

Wish me luck!


Saturday 24 November 2012

A couple for the guys


I have sorted out my blogger problems...although I still have used 99.66 % of my free storage, I have learned how to resize my photos to 800x800 pixels or smaller. The photos then don't count in the storage room ticker as they are in the "free size" and slide in uncounted!!! Yay!.

 I am still busy creating the rest of my Christmas cards.
DH has a couple of friends that are divorced and live alone. I was trying to think of cards to make  that were more masculine in feel.

The first is quite simple really...two strips of  embossed design paper, a Memory Box poinsettia and a stamped sentiment. A little plain perhaps, but it will have to do...I debated on a nice brown ribbon behind the flower, but since I had already stuck the striped paper down, I decided against pulling it back up to affix the ribbon. If I make another, I will definitely add a ribbon.

 I gave a generous outlining of stickles over the edges of the poinsettia and the sentiment to try to make up for the lack of umph! Everything on this card came from my snippets collection, or from my stash.

The second card is for a fellow that DH has known since he was in elementary school. He has us over every Christmas Eve and likes to decorate his house as well as his tree. He kind of goes for a certain look to his decorations so I thought this card would suit him.
I used two scraps of designer paper that weren't quite big enough to fit the card base. I added a piece of ribbon where the 2 pieces joined and popped a kraft card stock Memory Box snowflake die on top. Next came another of the infamous dollar store fabric snowflakes topped by a K and Co poinsettia and a wee sprig of holly. The sentiment is mounted on another snippet of kraft. I stickled the kraft bits a couple of weeks ago and stored them in my photo album snippets system, waiting for the right card to use them on.
Here is a closeup of the layered, stickled snowflakes and poinsettia.


I am going to skip the recipe tonight as I am a wee bit tired from the Black Friday sales! My daughter drove down and rented a lovely suite for us. It was so wonderful to have the time away with her. She worked all day, drove across the border and almost to Seattle,...then  we shopped til 2:00 am, getting all the "timed" bargains of the evening. Back to the hotel room for 3 hours of sleep and got up in time for the JoAnn's 6am opening!
 My two greatest  bargains were a new Fiskars Procision trimmer regular price $119.00 and i got it for  $35.99 inclusive of tax.. It was 60% off and then we had the infamous additional 25% off for getting up at the crack of dawn! I also got her a Cricut cake machine for.....you won't believe it....$29.00 It came with one cartridge and I have another at home. It is for that same daughter for Xmas although it won't be a surprise. I totally missed this bargain. She found it on a bottom shelf sort of hiding in the shadows in the clearance section. She was undecided as young Mums always seem to think of their families first and don't often spoil themselves. I offered to get it for her (as one of her Xmas presents) and slide it under the tree. She got a stern warning to look surprised on Xmas morning! Somehow when it rang through, the computer applied the 50% off coupon to it...even though that coupon does not include clearance. $29.00 I can hardly believe it...this machine will work with any paper just like a regular cricut as long as you don't use it for cakes...if you use it for cakes, it will still cut the paper but might leave your paper grease marked. She now has to decide which she wants to do most...I think it will be cakes!

After we loaded up the van, I went back in to purchase another but alas it did not ring up with the additional discount...but $59.00 is still a great price I think.

I am entering these 2 cards in the following challenge:
1. Pixies Crafty workshop  The first card is completely from snippets or stash
The second card is half from stash...the designer paper and the poinsettia are new (hangs head in shame).
2. Sarrn's Stamping for Pleasure Join in on the 25th of each month to enter your Christmas themed cards.
3. Craftyhazel's Christmas  The second card is the one I am submitting. It is the card for the fellow that invites us each Xmas Eve for nibbles and drinks.

Wednesday 21 November 2012

Drat! Having blogger photo storage problems

Drat and double drat!

I deleted someone's candy link on my blog and I don't know who it is to retrieve it. In a silly moment of mind wandering, I didn't glance carefully before hitting the delete button. I counted down the 2  candy's I needed to delete and deleted the first one (near the top) and then didn't account that now the numbers would be one less and promptly deleted the wrong one. Drat. Oh well, if I win blog candy in the next 10 days or so, it will be someone else's lucky day! hahahaha
Now, on to my double drat!
This is not my day...I was researching how to help a fellow blogger who has run out of Picasa room and can't post pictures to her blogger blog, and discovered that I have used up 99.65% of my Picasa room too.  I know now that I should have been re-sizing pictures to 800 x 800 pixels before uploading them. But I have learned that tidbit a little late!
It seems that deleting photos or resizing them now, is a moot point.as it doesn't seem to give me any more room.  I think that once I am over the free size limit google resizes my photos automatically...the problem lies in that very first time when you find out mid upload that you are rejected, you have to know how to resize them in mid transaction or you can't proceed..
Drat!
Some of you know that I have a brain injury from a car accident. I find it hard to learn new things especially from written directions. I do better with a demo!  I have been reading how to resolve this photo storage problem and now feel like my head is ready to explode...a common symptom of post concussion syndrome. You get that feeling when you try to rush your thoughts, multitask, learn something new, get tired, etc.
Drat!
I think I can avoid running out of room if I switch to google+
Google+ gives you more Picasa storage and lets you download photos larger than 800x800 without using up free space...(see I did learn something). But it appears that once I take google+, it automatically names your photos within your Picasa albums  your real name not your bloggy name.

I'm the pea with the family that fiercely guard their web privacy. Part of it is due to their jobs and I always endeavor to protect their feelings on this topic. So I need to find a solution to my nameand their names showing on photos.

Does anyone know how to resolve my dillemna...or how to take google+ and not share my albums at all?

There are 3 bloggers today with this problem that I know of...eventually everyone of us on a blogger blog will face this.
I could buy extra space for $2.50 monthly and will do that if I have to.

Thanks for any suggestions.

Tuesday 20 November 2012

WOYWW 181 - Same Desk; New Mess

Same Desk...new mess!

I am still a mess of Christmas bit s and bobs...but it is a new mess as I got sick of those other design papers so I pulled out some new ones!
I have all sorts of Xmas bits stored in all the containers I have out on my desk. Embellishments, stamped sentiments, snowflakes, bits of cards I have started and set aside over the years, fun pieces that I have pulled off old cards in the past,  etc. Yep, it is all there is a big messy heap. It is a little more organized than last week ,so I can actually manage to create a card here by pushing stuff over to the sides after I finish a card. As you can see, I am working on one right now. I am a bit stumped as I think that delicate aqua snowflake  border die is pretty with the Penny Black stickaroo ornament but I think the MERRY AND BRIGHT is too big and heavy in size to work with it.

Before you all say, what PB stickaroo???... the green ornament was from a PB stickaroo rectangle that got kind of dented in the Xmas snippet drawer. That drawer barely closes...my goal by the end of Xmas is to be able to slide that drawer open and shut without wrecking the contents at the top of the pile. I hate dented paper or stickers so I carefully trimmed away the white rectangle and kept the unblemished ornament in all its glory. I was trying to get a pretty contrast with the green and aqua...think I will ditch the MERRY AND BRIGHT and add a stamped sentiment directly on the card instead. I will have to hold my breath when I do it as I always manage to stamp crooked or have one tiny edge stamp lighter than the rest.

In case you are wondering why I am rambling on about my desk mess, check in at Julia"s wonderful blog Stamping ground and check out what all the other creative souls have on their desks this week. Make sure to leave her some bloggy hugs while you are there.

.

Monday 19 November 2012

Christmas, Kids and Cards

Little kids love to get surprises. They love to open an envelope, a little parcel or packet, anything that is going to be a surprise unfurling.

I am making some simple cards for kids that we can tuck a little chocolate inside. These corrugated cards would cost a fortune to mail as the card itself is a double fold so the interior of the card is 1/8 inch deep. Perfect for tucking a small prezzie into and hand delivering the card.

The Christmas season is a time for parties, drop in company, open houses, and visiting. It is always nice to have some kid cards on hand. You can't walk into a party with the hostess gift and nothing for the kiddies.

I thought this design paper was perfect for a kid. It has many of the images on it that kids associate with the buildup to Christmas. As I guess they would get handled a lot, I will keep them fairly simple.

The card base is covered with two snippets of that blue and red patterned paper with a piece of ribbon in between them (to stretch the 2 pieces to cover the card front).  After that, I just added some more of the infamous dollar store snowflakes. One big layered one,a few tiny ones up on the blue sky, some teensy diamond and it was done. Fastest card ever! I don't know if you can tell, but I used all three sizes of snowflakes on this card. There is the large shimmery oneas the base of the stacked layer. There is only one of the opalescent style layered on the largest snowflake in the sky. The other small ones are a white satin finish and are scattered on the sky and the snow.


Not bothering with a recipe on these super simple cards as it has basically already been described above.

I am entering this card in the following challenges.
1. Pixies Crafty Workshop   The snowflakes, bling and chipboard are all from my stash and the ribbon is my only "cut with scissor" :snippet!  Hope I don't get expelled!
.


Sunday 18 November 2012

Baby, It's Cold Outside

I'm still making Christmas cards but they are a little different. No coloured images today, as I attended the monthly  12 hour crop with my neighbour and a group friends. I only managed about 5 hours and part of that was lunch...but it is a start! It felt good to be creating in the company of other paper crafters. It is such a nice feeling to bounce your ideas off of people you know will tell you if they are rubbish!

I brought along a selection of gliittery images and created some more Christmas cards..
I think I have mentioned before that I am trying to craft from my stash. Although I still buy the odd bargain here or there,  mostly I am crafting with supplies lovely hoarded stored in the scraproom cupboards at home.

This one is a bit similar to the others I have been making but when you are trying to churn out 30, or 40. or 50 cards, you do need to do some repeats, or at least similar cards, to speed up the process. You will recognize  more paper from that MME 6x6 stack along with some K and Co glittery 3D snowmen.

Here are a couple of  views that show the sparkle and glitter.


Recipe
Card Bases _  Recollections brand, Michaels - corrugated cards and envelopes
Cardstock - red, from my stash
Designer Papers - MME,  Michaels
White Doily - From my stash, originally from Dollarama
White Snowflakes - Large and teensy white snowflakes from  my stash, originally from a Dollar Store
Border - Black glittered scalloped border from my stash, wedding bin
Snowmen - K and Co, Michaels
Bling - from my stash, originally from Dollar Giant
Dies - Nellie Snellen  MFD 020 Doily

I am entering this card in the following challenges:
1. Pixies Crafty Workshop - Must use snippets
2. Crafty Catz Challenge - Make it sparkle # 159 - My snowmen are heavily glittered, there is lots of diamond bling and the snowflakes are all shimmery and sparkly.
3.Crafty Hazelnut's Christmas Challenge - Use something over 6 months old - My snowflakes and the doilies are well over 6 months old.
4.  4 Crafty Chicks Challenge  - #16 - Winter
5. Crafty Calendar Challenge - Wrap Up Warm For Winter - My snowmen are wearing scarves and vests, a hat and a toque.
6. Holly Jolly Christmas Challenge  - Inspired by a song  -  Baby It's Cold Outside
7.Crimbo Crackers Challenge - Snowmen-/Snowladies

Tuesday 13 November 2012

WOYWW 180 Hide your eyes, sister of mine!

In my family they think I am the organized one...wait till they see my desk today. Oh my!!!
The week has flown by and I am still a sea of Christmas and don't really want to put anything away till I finish up the series of cards I am making at the moment. I tend to work on one type of Christmas card till I either use up all those designer papers and images that I have readied, or till I am well and truly tired of them. I then do a general "quick tidy and move on to the next "type".
If you are sondering why I  am about to show you my messy desk, check out Julia at the Stamping Ground and take a look at all the creativity and mess going on around the world.  Leave Julia some nice bloggy hugs while you are there.

So here it is in all it's glory...me in a big mess. That countertop you are looking at is 12 feet long and I have filled all of it with the bits and bobs I have dragged out. You are seeing about a 5 feet section, it looks the same all across it!  I am working over on the left hand side of the room where the counter turns into a run of another 10 feet or so. All the computer, printer,
TV, cricut and cricut accessories are over on that side, so I am down to creating in an 18 inch by about 30 inch area!!!
Just down on the bottom edge of my counter top you can just barely see the little bits of leftover double sided tape I have stuck to the counter edge. I try to leave them there and then work with them as I require a piece about that size...teehee...I am such a cheapskate!

In spite of the mess I have been managing to actually finish some cards. I took a break today from the winter birds, to try my hand at a snowman card. This is where my poor sister has to cover her eyes as she dislikes snowmen...Sorry Sis! She just thinks there are so many more images that are less corny to put on a card.
Luckily I am only making one of this image!

I struggled with the black again...I really need to take a shading course...Little Miss C want me to take her too, so perhaps I should sign up both of us! I resolved the problem by stickling the hat brim to make it stand out from the top portion. I also stickled the scarf, broomstick and broom ties. It is Xmas after all! One last little bit of stickles on the snow on his hat and I called it a day.
 I am a bit undecided about 2 elements of this card. I originally placed clear diamond bling on the red snowflakes but it just sort of looked blah...like it blended in. I decided to put black glittered brads on instead and then after poked 2 of through, I discovered that I didn't have a 3rd! Yikes! I have placed a red diamond bling on the sentiment snowflake...I think I need to search a little harder or possible vacuum as I am sure I had 3 of those brads out.  The teensy little red diamond bling scattered across the polka dots are supposed to represent falling snow...perhaps I am reaching too far with this one...
Here is a close up...let me know what you think...Perhaps I should scatter them randomly right across the
top of the card so they are above the snowman too...

.

Recipe:
Card Base - Michaels, Recollections kraft corrugated cards and envelopes
Designer Paper - Michaels MME
Cardstock - Kraft, red and copic paper from my stash
Diecuts - Spellbinders deckle edge from my diecut papers stash and Spellbinders mall ovals for the sentiment
Border - black glettered border is from my wedding stash bin
Brads - black glitterd brads from my stash
Bling - Red diamonds from my stash
Punches - Martha Stewart snowflake punch  (the smaller sized flakes are the same punch but I gave them a hair cut
Stickles -Xmas red, black diamond, chrystal
Stamp - unknown rubber stamp
Sentiment - unknown rubber stamp
Large white snowflake is from the dollar store a few years ago, I have a bag full in my stash

I am entering this card in the following challenges:
1. Pixies Crafty Workshop   - I used lots of snippets, Di.
2.Clear It Out Challenge  Use something red from your stash - the red cardstock and the red diamonds were from my stash.
3.Craft Room Challenge - Punches and Diecuts - I used the Martha Stewart snowflake punch and the Spellbinders deckle edge die for the snowman cardstock.
4.Bunny Zoe Crafts Challenge - Winter
5. Songbird Challenges Diamonds...See some sparkle and bling I have stickles, glitter and red diamonds.
6.Christmas Card Challenges - Snowman
7.Quirky Crafts Challenge Blog - layer it up and let it snow
8. Penny Black and More @ Allsorts- Any die will do - I used a Spellbinders deckle edge die for the snowman image sheet. I also used a Spellbinders small oval for the sentiment


Monday 12 November 2012

Another feathered friend.

Managed to get another Christmas card finished and have several in various stages of almost finished.
My FIL was famous for one liners.  If he were here he would glance at me with a perfectly straight face and say "Close but no cigar"! He was right so I need to get a mosey on!

As I was glancing at them all today, I realized that every card I am working on so far, has feathers on the main image. I must be planning a feathery Xmas! I do have 2 large white goose feather boas that I put on my fireplace mantle and tuck all around the bowls of ornaments and candlesticks...it sort of looks like snow from the distance...Don't know if my plans to start Christmas decorating as soon as the cards are finished is influencing my card choices...but here we go...another feathered friend.

I used those Snowflake corners again...I just couldn't help myself. I promise they won't be on every card...just half maybe! lol

I stickled the wreath on this cute Penny Black image and used some of the shimmery snowflakes from the dollar store. They are a sort of opalescent white/pink/ivory and because the goose has an aqua ribbon around her neck, I added some aqua off cuts I had saved from cutting a Memory box border last week.

I used a heavily glittered black scalloped border from my wedding stash...not sure the brand. After I glued it down I didn't like the way the polka dots showed through some of the cut out scallops and not through others. I stuck a K & Co candy border over top to sort of distract your eye from the dots...

Now, there's a funny story here...well, funny for you guys, maybe not so funny for me. After I glued down the glittery black border with a fine glue tape, I had to cut that same tape in half lengthwise to get it thin enough for the candy strip. It was kind of an annoying job as it gunked up my fussy cut scissors. As I was sliding the left over bits of border back into the original package, I noticed that it said "self adhesive" right up at the top of the package ahahahahaha  Silly me!
Here is a bit of a close up so hopefully you can see the glittery border and the stickled wreath. You can see the opalescent snowflakes beside the goose...you can see the pinky look on the one at the left, the right side isn't catching the light the same so it just looks shimmery.


Recipe
Card Base - Michaels Recollections Kraft Corrugated, from my stash
Design papers - Black Dots Michaels MME; bluey/green chevron paper Echo Park  "Splash by Bella Road, Big Dots"  from my stash
Cardstofk - red die cut snippet from my stash
Borders -  Black and candy borders - K & Co, from my stash
Memory Box Dies - Snowflake corners, from my die cut stash
Nestabilities -  Oval and Salloped Oval
Sentiment - Noel from Seasons Greetings Echo Park, from my stash
 Stamp -  Penny Black, Overdressed Duck

I am entering this card in the following challenges:
1. Pixies Crafty Workshop     http://pixiescraftyworkshop.blogspot.ca/  I used lots of snippets from my stash
2. MFP Speedy TV Simple Salutations Challenge Mark's Finest Papers a Heinrich Co      Winter Birds
3. Penny Black Saturday Challenge    Cute Christmas
4. Penny Black and More at Allsorts    Any die will do - I have several dies, Memory Box Snowflake corners and Nestabilities Oval and Scalloped Oval

Sunday 11 November 2012

Christmas Caroling

My big worktop is completely covered with all the bits and bobs needed to create my Christmas cards. With barely an inch of space left, I am forced to glue my cards together over on the smaller left hand side of my room.
So with the printer to my left, my cricut ahead of me and my computer to the right, I am creating cards on about a 30 inch wide by 18 inch deep space...and I am surprised that I have managed to keep that uncluttered!!!

Somehow, no matter what, I always find something after I am done that I decide would have looked perfect on my card. I'm sure I am not the only one...so my solution is to spread out everything that I can in the hopes that I will not miss that perfect finishing touch...teehee.

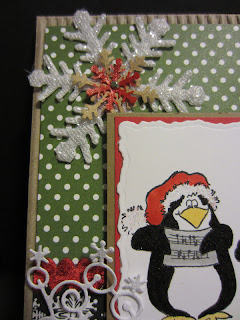
So here is the first Xmas card of what I hope will be a sea of many. I stickled the fur trim on the penguin's hats and ended up having to stickle the penguin bodies as well. I do not know how to shade properly...actually, in all honesty, I do not know how to shade at all!!!

I coloured the black on the penguins and the nib marks from my copic pens seemed to show no matter what I did. I didn't have a script tip, just a fine pointy tip so maybe it was because of that. Using the blending pen seemed to change the colour to grey...I have decided that I hate colouring things black, so I stickled all over the blackffeathers as well!!! Well, that took care of that!

This card will be hand delivered so I used one of the thick corrugated kraft card bases. I wasn't worrying about keeping the thickness down for the mail, so I added a wee bit of decoupaged ivy in the bottom right hand corner to balance the diecuts on all the other corners.

Here is a close up of the snowflakes. The largest one is from a pack of 30 or so, from the dollar store. I layered it with a Martha Stewart punched kraft snowflake. The little red one is from another pack of 100 or more, from the dollar store as well. It is a  shimmery, fabric flake that looks almost pinky/ivory translucent on the front side...so I turned it over and colored the back of it with the copic pen I coloured the Santa hats with. I think I need to add another coat of pen ink as now I notice that it doesn't quite match! Yikes!


Here is a shot of the wee piece of decoupaged ivy.
This one makes just under 20 finished...and what seems like a zillion more to go!  I'm getting into the Christmas spirit with a little Michael Buble to help me along...now as long as I manage to avoid the Christmas spirits, I should be able to finish 3 or 4 more tonight!!!

Recipe:
Card base and envelope -  Michaels,  Recollections,  Kraft corrugated (from my stash)
Designer paper - Michaels, MME Christmas
Cardstock - kraft and red from my stash
Copic paper - from my stash
Ribbon - red velvet scalloped ribbon from my stash
Nestabilities - Deckle edge large
Memory Box Die - Snowflake corner
Snowflakes - Dollar Store, large white flake
                   - Martha Stewart Punch, kraft medium size flake
                   - Dollar store, small flake (coloured red with copic pen)
 Stamp - Caroling Penguins  Penny Black
I am entering my card into the following challenges:
1. Pixies Crafty Workshop http://pixiescraftyworkshop.blogspot.ca/ Use snippets. The kraft and red cardstock are snippets and also the Memory Box Dies are from my diecut snippet photo albums.
2. Come And Get It challenge  http://comeandgetitchallenges.blogspot.ca/  -  Swirls and flourishes. My Memory Box snowflake flourishes
3. Joanna Sheen Challenges   http://joannasheenchallenge.blogspot.ca/  Cold and Frosty
4. The Ribbon Girl   http://ribbongirls.blogspot.ca/   Add Sparkle. My penguins Santa hats are stickled on the white fur trim and the penguins black feathers are stickled as well. The large white snoeflake is heavily sparkley.
5. 2 Sisters Challenge   http://2sisterschallengeblog.blogspot.ca/  Use your favourite Xmas image.  These penguins are my fave image for the Xmas season.
6. Hiding in my Craftroom  http://www.hidinginmycraftroom.com/ http://www.hidinginmycraftroom.com/2012/11/himcr-71-super-scraps-saturday.html     Super Scraps Saturday. I used my stash for the red and kraft cardstock. I also used diecut stash, the Snowflake corners The snowflakes have been in my  Xmas stash for about 3 years now.
7. Sweet Stamping Challenge   http://sweetstampinchallengeblog.blogspot.ca/ Anything goes, must include stamp The singing penguins are a stamp.
8. Christmas Stamping All Year Long  http://christmasstampin.blogspot.ca/   Anything goes
9. PaperPlay Challenges   http://paperplaychallenges.blogspot.ca/   Snowflakes
10.  ABC Christmas Challenge http://abcchristmaschallenge.blogspot.ca/  V is for vibrant colours
11.  Penny Black Saturday Challenge http://pennybfriendssaturdaychallenge.blogspot.ca/ Cute Christmas
12. Whimsey Stamps http://whimsyinspires.blogspot.ca/ Traditional Christmas colours

Tuesday 6 November 2012

WOYWW 179 A Sea of Christmas!

Well, this week finds my workdesk finally cleared of the gardening cards and swept into a frenzy of Christmas bits and bobs.
There is a lot going on here today and I am busy trying to be organized in the midst of the Christmas excitement. Warning, this post is a bit picture heavy!
You are being greeted with a sea of stamped images...some stamped better than others...sigh...I seem to have an uneven hand at times...usually it is on the sentiments and today is no exception...hence the whole strip of sentiments to get maybe 2 good ones.


Just over to the right you can see some hot pink stripey photo albums...that is how I store my stamped images which have been already cut up into die cut shapes.


Here is a little peek into one of the stamped image albums.


Other albums contain snippets which are cut up into diecuts and filed away for later use. I cut dies for myself and for the evergrowing card making addiction of my little 6 yr old grand daughter,  Little Miss C. Sometimes even my girls will come and make a card. I like to have a hearty supply of dies,  it is just so much quicker and easier to make a card if you have supplies on hand.

So here is what is stored inside my little albums right now. I would like to eventually roll off dies cut and then do up each album by colour theme...pastels, white/ivory, primary, fall colours, etc But for now they are just cut and placed in a sleeve to protect them.


These next ones are full of the bits and bobs I have cut for my Christmas cards. I plan to bury myself in making Christmas cards for the month of November. I think I am going to have a lot of fun.


I even save the negative images as you can see below. Every now and again there is a challenge that asks for negatives...but I think I just like the look of them on certain cards.

On some fancy borders and corners, I even save the little cast off bits...like this...

I hope you enjoyed my tour today...and hopefully I haven't bored you to bits...pop back next week for some finished Christmas cards.

If you want to pop across and see what Little Miss C is up to, I have entered a post for her too, right behind me. Stop by the lovely Julia's blog to see all the other workdesks and make sure to leave her some bloggy  hugs http://stamping-ground.blogspot.ca/


Sunday 4 November 2012

Cards from across the pond!!!

I had a special treat last week.

 Not one, not two, but three cards from across the pond.  Three gorgeous, handmade, get well cards.

The first parcel arrived from the lovely Jo, at "a little piece of me"  http://mycraftingcorner-jo.blogspot.ca/
She sent a little box that contained 2 cards, one from her daughter and one from herself. Now I had heard of the little card mailing boxes on some of the British girls blogs, but I had never seen one before...Now I understand what you all mean when you talk about card boxes. I always wondered how you manage to mail those gorgeous, bulky cards!!!
Jo was one of my very first followers. She was so friendly and helpful when I first started my blog. It was Jo who encouraged me to try and enter some challenges.  When I wrote back that I had post concussion syndrome since the car accident and didn't think I could figure out a method to enter and keep track, she kindly emailed me with some great organized ways I could choose what to enter, track my entries, and check the winners. With her encouragement, I signed up for some challenges and learned to love the thrill of entering them! Jo is very organized with her time as she has her blog, makes gorgeous cards, is on design teams and has 6 children!!!

Here is the card she sent me...I just love the flowers...I love the gorgeous little centers of my beautiful flower pot of blooms. Tucked just in between the blooms, is a pretty little butterfly!  Jo used a lovely, large (by Canadian standards) scalloped card base. Let me tell you, the weight of this paper card base is superb! On our next visit to England, I plan to bring back packages of these great card bases.
Here is an arty view of those really pretty flower centers.


Tucked into the box was a second lovely card from Jo's daughter Rebecca, at Rebecca's craft corner.
http://becciscraftcorner.blogspot.ca/
 She is a very talented young lady and is on design teams herself!!! She colored this sweet little image and it really touched my heart. Rebecca and Jo follow my grandaughters blog and of course I follow Rebecca as well. This card is just one of many beautiful cards this young lady has made!

All in all, I was having a pretty good week. Two cards from across the pond and a trip out for 4 hours to the crop at the local scrapbook store. What more could a girl ask for! As luck would have it.....................

Another card from across the pond!!!   This time it was  from the lovely Sarah of  Created by Sarah
http://createdbysarah.blogspot.ca/  Sarah has a little girl Emily who is about the same age as Little Miss C. She posts her gorgeous cards on her blog as well as her design team work and sweet little stories about her llife with her little girl, husband, and some very sweet wee kittens. Sarah's card contains something that I always love on a card...Kraft paper...and again, like Jo's, it is a gorgeous weight of paper. Her card also has a hidden surprise...A card insert!  I had read about card inserts here on the British blogs but I was not positive what it was...I thoaght it was a sort of inner liner to write on or print a sentiment on but wasn't sure...I actually left a comment on a blog this year, asking what it meant and how it was attached!!! Well, Sarah's is attached just as they described and had a lovely little letter.

The sweet little girl on Sarah's card touched my heart as it looks a bit like Little Miss C when she was a toddler. She was always a child who liked to stand back and look at things carefully...a little girl who is so quiet and still when she watches nature, that a bird and some butterflies have flown onto her hand and stayed for a wee visit. This sweet little image captures that type of child I think...

So a massive thanks to all three of you...You brightened up my week and it was so lovely.

For those that have asked, I am getting better every day. I can walk about 25 minutes at a time on my activator poles. They are a bit of a pain for shopping as they take up both your hands...but I have learned to shop with a cross body packsack on facing the front...Yes, I know I look like a weirdo, but so far, people have been kind. I mostly shop where people already know me so maybe that is why they are so kind.

I still need a second surgery on a lower section of my back...so I do still have pain and mobility issues....it is tiring...it makes me keep on track with my homework for this recovery so I can get through it and get the second one done!
I did get a side effect that I was warned of prior to surgery....It is the one I was hoping not to get....it is nerve neuropathy down my right leg...similar to sciatica but about 10 times worse...Luckily, there is a wonderful drug that masks it....but it makes you really sleepy all the time.
I  fall asleep during the day...I swear I could even fall asleep in the middle of lunch!!! teehee Luckily, I don't have to work any longer, so it is a managable problem....I manage it by just giving in to it and napping more!!! I have fallen asleep on the computer blogging!!! teehee   If I leave any of you a comment that doesn't quite have an ending...you will know I fell asleep before I finished.   teehee!!!

I have always believed a sense of humour and the ability to poke a bit of fun at yourself can get you through anything...It has sure been true for me lately.