Wednesday, 1 February 2017

January Rudolph Days Challenge Winners

We have two prizes this month so let's get on with drawing the lucky winners!


I have used Random Org to draw our first winner and the winning card is entry number 7, Sandra H.
Sandra, you have a choice between the Memory Box Reindeer Scalloped Circle Frame,
or the Wild Rose Studio stamp Penguin with Present.

Could you drop me an email at maureenkane@telus.net to let me know your mailing address and which prize you would like.

Our second prize draw this month was also drawn by Random Org.
Sadly, I had to draw twice for the second prize. as the first winner did not show anywhere within their post that their card was entered at Rudolph Days Challenge, nor did they have any link back to Rudolph Day. I do not think it was an oversight as they had entered several challenges that were not mentioned and  did they have any hyperlinks back to those challenges either. They did have three of their challenge totals listed and linked, but Rudolph Days was not one of them.

Our next second prize draw used Random Org. The winning card is entry number 11, Sandy J,
Sandy, you have a choice between the Hampton Art 6 piece stamp and tag die or the Stampendous stamp,  Snowman with Tree.


Sandy, could you drop me an email at maureenkane@telus.net to let me know your mailing address and which prize you would like.

Congratulations to you both and I hope you each enjoy your prize!

Sunday, 29 January 2017

Trying to be creative for Darnell's NBUS #9

Tonight is the closing of week two at Darnell's NBUS Challenge #9.

NBUS stands for "never before used schtuff". Darnel is also celebrating 1000 posts, over 1000 followers and has fabulous prizes on offer. You can still join in, as this is part of three weeks of celebrations over at Darnell's blog. Go to  djkardkreations blog to enter or just to check it all out!

My NBUS item on this card is the Inkadinkado Christmas Silhouette stamp. Although I have previously posted a card with this stamp, it was with a borrowed stamp. At one of the garage sales last summer, I managed to snap up this set of stamps, still in the package, for $2.00.  Oh my!


My other NBUS items are the Yupo paper, as well as the Citrus and Mermaid alcohol inks which I used to create my background.

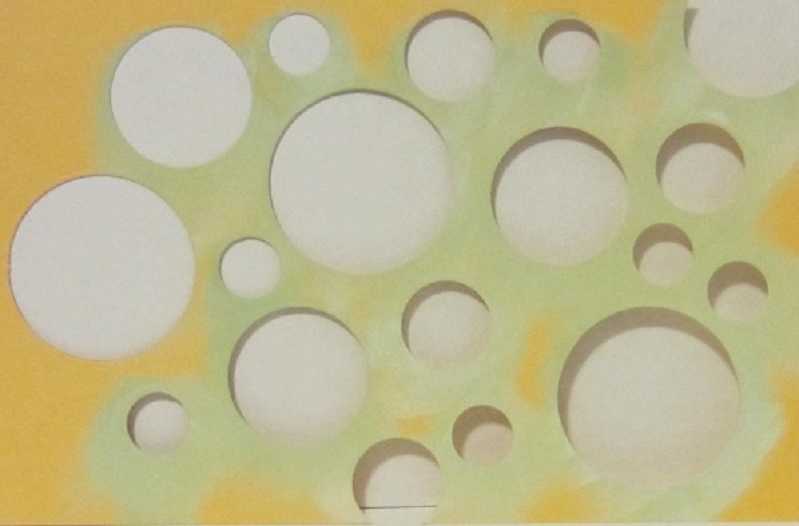
This card is a bit of a twofer in the optional card category. I was trying to CASE Darnells Blog Header, and wanted to add a Bokeh look.  I cased that idea from  Jane at Jane's Journal Blog.
Here is a photo of her background.


 I decided to only ink over 3/4 of my yupo page, thereby leaving enough faded out inking with even a bit of the bare page for my Hidden Word.

I inked my Yupo and did not quite manage to get Darnells Blog Topper look as this is the first time I have ever used Alchohol inks on my own. I did make a card topper in a class a couple of years ago, but it was not on Yupo. It was a lot of fun and I now want to make more backgrounds to have on hand!

I made a stencil from some heavy weight card and die cut a swirl of different sized circles for the Bokeh. I stencilled the circles over the inky Yupo with Prima Ingvild Bolme Pastel Yellow Chalk Ink to create the bokeh look.


After that was dry, I stamped the Angel with Momento Black Ink and Sprayed the whole topper  with Imagine Crafts Sheer Shimmer Spritz.  I was horrified to find the black ink ran over the page. I tried to control it with the edge of a sheet of paper towel and then realized that the ink was just wiping off!

So...I used a Lysol wipe as it was the only thing I had on hand that was damp, and I wiped off the card...oh my! I did take off quite a bit of lovely colour I had created on the yupo... I was left with a sort of shadow of the angel...sort of a light grey. I then very carefully restamped the angel image with Versamark and used Stampendous Marcasite Opaque glitter to add some sparkle.  There is the teensiest hint of a shadow around the halo and the wings...oh well...


I could not get the black embossed powder to dry properly. I did not want to get too close to the Yupo as I had already managed to warp another piece of it earlier. I finally gave up and hairsprayed the whole topper, thereby sealing in the embossing powder...sort of like setting glitter!

I cut the Crafty Cuts NOEL die from the snippet of inky Yupo that was left over, and mounted it on pop dots for some depth to help it stand out from the page.

All in all, this card was a lot of fun to make. Defo a learning curve to the Yupo and now I want to watch some U-Tube tutorials on how to best create with this fun product.

PS  I just set my card up to photograph and I see that hairspray does not hold embossing powder! I managed to touch the snowflakes around the Angel's horn and the black powder came off on my fingers...leaving the greyish smudge where the old image used to be,,,Ugggh... I have stamped
a couple of wee snowflakes to try to cover it up somewhat, but will post this anyways...

Saturday, 28 January 2017

A CASE Card

Finally made my Christmas card for the Rudolph Days Challenge. My old and new Design Team members made such gorgeous cards for my Jan 25th post, that I decided to hold off on posting my own card. There is plenty of time to get creative yourself as you have until midnight on the last day of the month to enter your Christmas card or project...

I made this card to participate in Darnell's 9th NBUS Challenge .  Darnell is running three back to back challenges celebrating 5 years of blogging, her 1,000th post and over 1,000 followers. The prizes are fabulous and you can enter three times each week.

The entries must of course be NBUS (never before used Schtuff) but there are optional themes too. One of this weeks optional themes is to Case a card and the other extra theme is to use a partially hidden sentiment. You can check out this challenge and the rules for it, on her blog djkarkreations 

I CASE'd my card from Brenda at Floral Fantasies. Here is a photo of Brenda's card...


I first cut a a piece of ugly heavy weight card stock into a 5 1/2 x5 1/2 square . I drew a line down the middle of the square at the vertical half way mark. I then used this pencil line to keep my Memory Box Drop Ornament die centered and straight. I taped this homemade stencil to my craft mat at the top and bottom and the right hand side. I used the opening on my left to slide my card under the stencil, and used Prima's Ingvild Bolme Pastel Brown chalk ink to shade the ornament shape onto my card.


I wished I had a larger bauble die as I only had a couple of image choices due to size restrictions!
Stamped my PSX F323 Peace on Earth stamp with Momento Brown and coloured it with Pencil Crayons and gamsol. This is a very old stamp...it says 1988 beside the manufacturer!
I bought this stamp at one of the papercraft stores garage sales. Although I have had it for quite some time, I had not used it yet...clearly a NBUS item!


I then slid the card back under the stencil and sprayed the ornament area with Imagine Crafts, Sheer Shimmer Spritz. I was a little too close and got a couple of large drops plus a sort of washed out area on the right middle, so I let it dry and resprayed, concentrating on the left this time. Seemed to even it out somewhat.

I had a sentiment all picked out and had placed the ornament to allow room for it. Then I realized that the stamp has the sentiment built right into it! So I added some  Mariane corner dies in shimmery brown pearlescent cardstock and made the bauble topper from the same paper.

If I was to do this card style again, I would make it at least 6x6 and use the larger bauble dies that are free to use at my local papercrafts shop. That would give me more choice for images.

I am entering this card in the following challenges:

1. Darnells' 9th NBUS Challenge @ djkardkreations - must be NBUS with optional themes of CASE and partially hidden sentiment (my card is CASE and NBUS item is my stamp).