Showing posts with label WOYWW. Show all posts

Tuesday, 10 September 2013

WOYWW # 223 - Getting back into the swing of things

Now that we are home again, I am trying to re-establish routines. Routines to get our lives back on an even keel. Routines to accommodate grandkids, kids, family time, friends, housework, the garden work and crafting. Especially crafting!

The pace of life here in the Lower Mainland can be crazy at times. Lineups for everything, circling for a parking space, traffic jams...uggggh! A far cry from our Filey days where we walked everywhere in town...even down to the beach. I am trying to find a way to simplify our routines here. While we can not walk everywhere here, I think I have thought of some ways to incorporate walking into our weekly life.

On the 2 days per week that we walk the grandkids to school, I hope to get our errands done before the grandkids need walked back home. Most of the time, my SIL is home to pick them up,  but if I make those two days my shopping, library, grocery, drugstore days, then I am still in the area to pick them back up if he is kept late at work. Since all those places are within walking distance (within a mile) of my daughters house, those will be our walking days!

My plan is to then have 2 days to just stay home...not leave the house at all...and hopefully get some crafting done. Of course the dreaded housework and garden work still need done, but there are 3 other days each week!
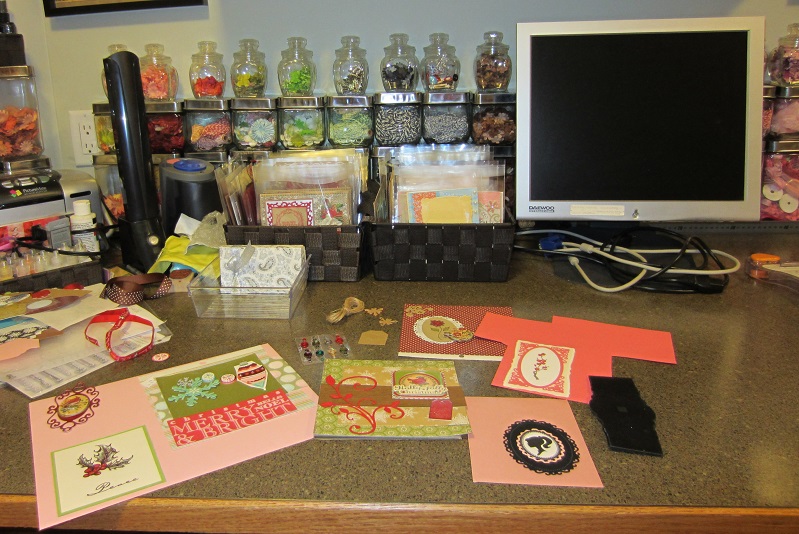
So keeping my new plan in place, here is my desk this week. Three cards finished and several more laid out and ready to start. So far so good! To boost my resolve, I have been making fairly easy cards...I am easing gently into taking on a stamped and coloured image card...but if all goes well, I should have that to show you next Wednesday!

A bit of a closeup...


Now I would like to ask you a favour. Some of my followers have been having trouble accessing my blog. They are getting a 503 error code when they try to comment or to gmail me. This is a blogger problem that has occurred for the past few months since blogger made some country code changes. Many Blogger blogs are having this problem and the bloggers are not even aware of why their comments have dropped somewhat. I only know because one of my bloggy friends has both of my email addresses. She is getting a 503 error code on my blog and let me know through my regular email. I am trying to figure out how big this problem for me, so if you are not able to comment on my blog, could you drop me an email at...
maureenkane@telus.net   You can keep it even shorter than the average comment! Just three word... Getting error code...and I will know what it means!

Solving the problem means redesigning the way my blog posts read...switching to single post views rather than a scrolling type format. I would prefer not to change that, so knowing how many commenters are affected would help me make a decision. Thanks so much for taking the time to email.

If you are wondering why I am showing your my desktop, drop by Julia at the Stamping Ground for an explanation and a chance to peek at all the other work desks around the world!

Wednesday, 17 July 2013

WOYWW 215 The RV Version

Every Wednesday you can pop by Julia @ Stamping Ground blog and have a little snoop through some delightfully crafty work desks...desks from all around the world!

My desk is a little different today...We are up at the lake and it is a scorcher! I spent the day with the quilters crafting group in the coolness of the Adult Clubhouse. We bring a packed lunch and each week someone brings cream for the coffee and something to share. Although the group meets from 9 am till 4 pm, I head over after aquafit, around 11 am.


I headed over with a tote bag of some bits and bobs...just enough items to make a few cards and a  big bag of cherries, some cookies and the proverbial cream!


My worktop is not too exciting...I can only carry so much and still manage walking with my poles. So I only brought the bare essentials I needed to make some sort of inspirational cards. I managed to make 6 cards...but had a wonderful afternoon of chatting, a wee bit of catching up on the latest going-ons within the resort and lots of smiles and laughter.
Here is a little closeup of my production line for my next 6 cards. At the front left, you can see where I have just finished painting the edges of the diecuts I brought with me, and rubbing the paint across the top of the embossed chipboard shapes.You can see the bottle of paint in the middle.  Back right has little golf ball boxes with some extra diecuts (unpainted) and odds and ends of embellishments I thought might work out.
Having a golf loving husband does come in handy at times...He always brings his golf ball boxes downstairs and hands them over like they are gold....lol They are great for dividing up and setting out various groups of embellies.

Here is the close up of the other side...I really meant it when I said I just brought a few things; 3 sentiments stamps for the inside of the cards, a wee acrylic box of bling, tape, pop dots, scissors
and a mini cutter...that is about it. Almost forgot...the el cheapo dollar store photo albums at the far right back, are full of pre-cut kraft card stock die cuts. I roll them off the Big Shot when I am bored and find them so handy to grab for a crop.
Some of the ladies were busy with plans for the quilt retreat here is Sept...$30.00 for 4 days of quilting
in the clubhouse...some of the husbands have offered to bar-b-que some suppers! What a bargain!
Others were busy making costumes for a 50s style do that is coming up next month. One was happy to model her poodle skirt...

Others were busy working on placemats...


And others were working on quilts of various sizes.


This little ballerina quilt will be given to a local charity...what a generous quilter!

Tuesday, 9 April 2013

WOYWW and a few more flowers used up!

Managed to get 2 things crossed off my crafty list today.
1. Make birthday card for a friend who loves purple...gulp...you all know I am not a fan of purple...but I have decided that I need to get over it! After all, there is purple card sitting in the cupboard, there are purple flowers piled in the glass jars and there is even a spot of purple chalk in the box that has...wait...NEVER been used...hahahahha

2. Use up some flowers.
Now, I may have stretched this one a bit . . . I didn't have any teensy purple flowers...I think it is probably the only teensy colour that I don't have!  I dumped out both glass jars of teensy ones and swooshed around through the mess  array and no such luck.  It was only when I pulled out the petals to make the larger blossom that I realized the petals had green in them...back to the mess and plucked out some green ones. Nine to be precise...9 down, a zillion to go to meet my goal of "using up" some flowers...

Why am I rambling on about my teensy flowers? Well, just so you understand why my desk is covered with a sea of teensy blossoms. I am showing my desk to the other creative people who like to link up with Julia, our hostess at the Stamping Ground  and see just" What is On Your Workdesk" this fine Wednesday.

Here's mine!

Those of you with magnifying glasses may have spotted the second larger blossom sitting in front of my card.
Here's a close up to help you out

Most of my flowers are a bit sad and tired so while I was making one, I decided to make 2.  They were blossoms on silk hydrangea bushes at Walmart, on clearance just after Autumn about 8 or maybe 10 years ago! I bought every fall colour they had. It feels good to finally use them...they are not the regular silk ones...they are sort of a papery feeling flower, no "silk sheen" and they don't fray. Some of the blossoms even have a velvety feel... I combined it with a single green flower hoping it would look like the stamen. Held it all together with a teensy purple brad and put a drop of glossy accents between each layer to stop any shifting. A shot of Crystal stickles and here is how it looks up close...mind my chubby fingers!
Hope to get round to as many desks as I can. I usually visit the row I am situated on, any bloggers that I follow, and of course anyone who visits me!

Tuesday, 19 March 2013

WOYWW 198 - The room

Bit of a different view of my desktop today. This is the entire south wall of my craft room. . Usually my desktop photos are taken in that left side of the photo...in front of the glass jars, under the hanging white shelves. As you can see the counter top extends way over to the right and there is another opening to place a second chair. Yes...I am ashamed to say the ribbon and lace have not been put away yet!

I decided to show you that "right" side of my desk today.
This is where my neighbour Lisa sits, when she comes over to craft.  The counter top is about 12 feet long altogether and actually tucks another 16 inches behind those tall cupboards.
I utilize that hidden, tucked away area to store stacking boxes full of  card projects in various stages of assembly. There are boxes of card UFO's; boxes of precut card kits for lazy day creating; boxes of kiddie birthday card kits for the grandchildren's visits, boxes of card embellishments, etc.

Just above Lisa's chair is a hanging cupboard. I store all my prefolded card bases in those 4 black boxes on the bottom shelf. I had to store the matching envelopes separately as I did not have room here. They are all  typical  Canadian sized card bases. I bought them just as I started getting into card making. I was lured by a huge 75% or maybe even  80% off clearance sale, when one of our local scrapbook stores changed owners.

Fast forward to blogging and actually learning more about card making and seeing other people's gorgeous 6x6 heavy weight card bases and suddenly mine seem so flimsy and tiny!  I am on a campaign to use them up so have been using them to make the birthday cards for the grandkids pals   They are also suited to note card type cards ( like Hello or Thinking of you) as they are lightweight enough to use to write a bit of a letter in.  I am also using these for the series of cards I am making to mail each fortnight to my daughter in Monaco. I keep those to the $1.80 international postage so if the card base is light I have room to tuck in more pages of letter writing or perhaps some artwork from Little Miss C and Little Mr P.

The little brown woven baskets on that first shelf hold a few teensy self inked, word stamps. I love these as they come in handy to just add one word to a tiny tag. There are some date stamps in those bins as well...My trusty label maker sits in the brown woven basket on the right.

Second shelf hold my 5 1/2 x5 1/2 corrugated cards (both finished ones and new ones) and also holds  my 5 x 5 white cards. My large and small  Zyron machines and glue gun refills are on the right..

Cricut cartridges are on the third shelf with stamp cleaner refills and archival mist in that bin on the right. I save stamp cleaner containers as there are recipes on Pinterest to make your own. I have made one up for Little Miss C.

Fourth shelf has a metal box of puffs for chalking as Little Miss C prefers to chalk the edges of card elements. She likes that if she gets carried away with putting too much on, she can just erase it off again!!!
There are a couple rows of old fashioned acrylic paints and scrapbook paints at the back. I know they are out of style but every now and again I use them, so hate to throw them away! I am just a pack rat at heart!
The photo paper for my Epsom Picture Mate is over on the far right.

Top shelf needs a raised step to reach anything so it stores bits for scrapbook UFOs. The far right is a stack of  finished  8x8 pages for a album I'm working on for my Mum. I haven't been scrapbooking as much since I discovered I'd rather make cards, so this stuff seemed a good choice to tuck way up there!

Want to peek into the scrapbook/papercraft rooms of other crafters? Join Julia @ Stamping Ground and you can blog hop through nearly 200 other rooms too! Be sure to leave Julia some bloggy hugs as she sponsors this whole shebang!


Tuesday, 12 March 2013

WOYWW 197 Thrifting and Candy

My desk is a sea of ribbon and lace with the rest of my thrift shop finds buried underneath it all. It is in desperate  need of sorting!
They were all bargains from a fun day out with a girlfriend, wandering thru the various thrift shops in our area.   There are so many different types of ribbon and lace and so many colours and shades of colours that I feel giddy sorting it.

I usually roll lace on a bobbin winder thingy and then slide a teensy  elastic band around it very loosely so it doesn't get imprinted with a tight sort of pucker indentation..I then toss those into my rows of colour coded square glass jars that sit at the back of my worktop counter. Haven't managed to get this stuff sorted as I am out of elastics...well that's my excuse and I am sticking to it!!!

Here they are broken down into the individual lots I bought...
75 cents for all of these
and $1.50  total for these two lots.

You might remember the card I made from cutting up and 3D layering three floral shower invites. I found a few more invite sets that day...this sweet embossed tiny watering bucket of flowers and a set of three 25th wedding celebration invites. Strange as it may seem...I bought them to use on Christmas cards with the fancy 25 being die cut and used to symbolize Xmas day. They were 15 cents for all of them! The spool of thread was 15 cents and will come in handy for stitching on cards or layouts. The clear basket of ribbon and lace was 50 cents...I love the hot pink!
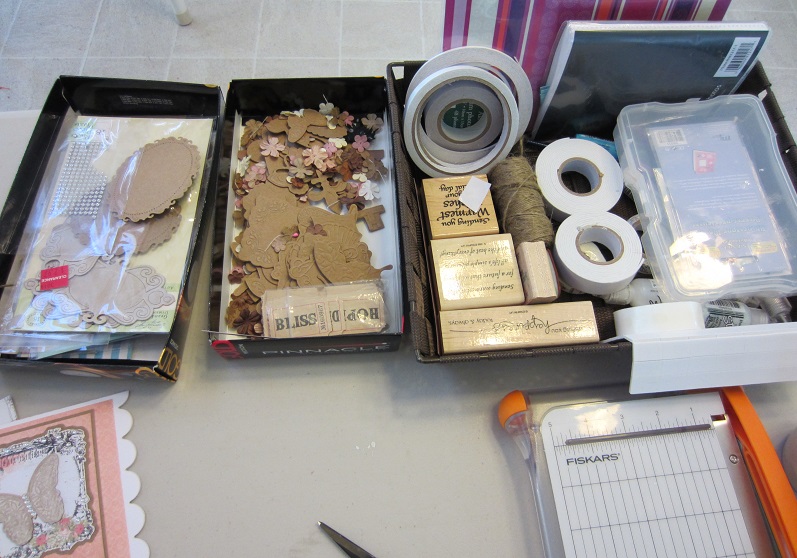
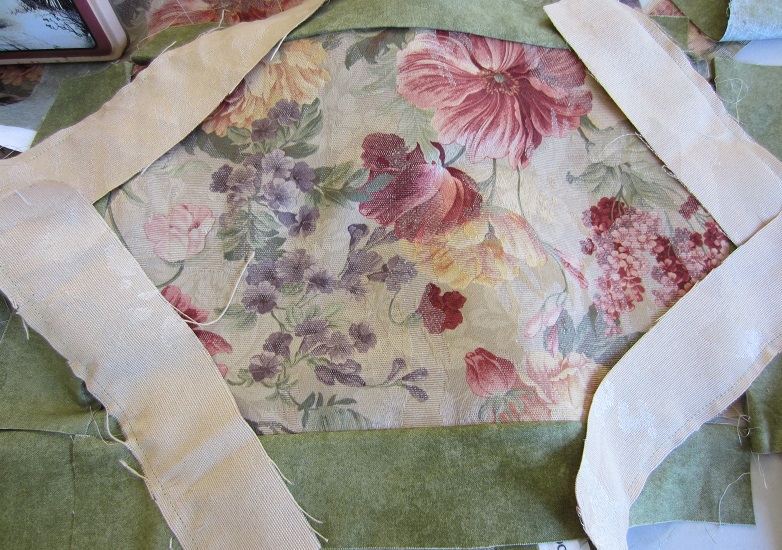
On the far right of the first photo, you may have noticed some crinoline material.and a  huge piece of  linen fabric. Here is a bit of a close up.
That linen jumped right into my basket as soon as I spied the $3.00 tag for a 60 x 106 inch piece! I have started to tear some into strips and may stamp a sentiment on it. Some I will cut into flowers and who know what else! I just had to have it.

Off to the far, far left of the first photo you can see the lovely blog candy that I won from  Daniella Hayes at
Daniella Hayes Layers of Creativity blog. Lucky me! She drew my name and sent me this lovely assortment of Tim Holtz products. Daniella tied them up with jute and decorated the Kraft tag with a Hello Kitty theme!
There are two distress inks - tumbled glass and pumice stone and a distress stain - broken china. There is also a TH Stampers Anonymous Visual Artistry stamp set - Natures Elements. I love the images but particularly love the sentiments. They will  be perfect for the inspirational type of cards I am sending my daughter in Monaco. Thanks so much Daniella!

 Stop by Julia's blog Stamping Ground and you too can visit all the other creative work desks this week.

Tuesday, 12 February 2013

WOYWW 193

Time for a peek at all the other crafty desks and see what they are up to...lots of wonderful ideas for creating and organizing can be found here...in between you will also find the friendliest bunch of crafters you could ever meet...
What am I talking about, you say? Well it's What's On Your Workdesk Wednesday...the day to see exactly all of that!!!

So join in...pop over to the lovely Julia's blog Stamping Ground and check out the fun...but be sure to leave her a nice comment before you begin to blog hop.

My desk is a bit of a fright...I am just finishing up a card...just have to cut the card base and then need to glue the elements down...maybe a couple of pearls and it will be done. The bouquet of flowers on my handmade card front are fussy cut from a packet of 10 invitations and envelopes that  I bought at the thrift shop for 15 cents!   I fussy cut  3 of the cards, cutting a smaller portion of the scene for each subsequent layer.   Stacked and pop dotted the layers to create a card front!  I should be able to get 2 additional 3 layer cards out of that packet plus one left over image to tuck in to something eventually...for now it will be doomed to the snippets bin!

I am not including a sentiment as I am not sure if it will be for a birthday or???
But what's all that mess at the back of my photo you say?  There are stamps coralled in a little bin that are cleaned and waiting to be put away; stamps waiting to be used; a bag of ribbon from the thrift shop waiting to be ironed and hung up; a huge stash of Michael's treasures; and various odds and sods that really need put away! The crocheted ribbon on my floral card front came from that thrift shop bag.

I have featured some of the Michael's 90% off the last ticketed price treasures on a couple of my cards lately and have had some requests from my blogger friends asking me to show some more of those bargains.
They are patiently sitting there under the stack of stuff at the back...waiting for me to get clicking with my camera. Hope to get them posted by the end of the week.

The beautiful bird hooks were a present from my little sister...trying to think of just where to hang it.  I have a couple of pretty aprons that I wear to protect my clothes when I stamp. It might just work out for hanging those on it. Trouble is there is not much black wall space left in my room...teehee

Off to finish my card and check out all the other workdesks!  I try to visit the vertical row I  am placed in and any blogs I follow and of course I  return the visit for anyone who leaves me a comment! I have visited 2 vertical rows a few times. and even made it round to everyone a couple of  times...

Have fun!

Tuesday, 1 January 2013

WOYWD #187 - A whirlwind of cleaning for a wee tour!

We've had a few days of eating good food, munching on sweets and yummy nibbles and generally sticking close to home, lounging around the telly or listening to Christmas music. Totally relaxing and enjoying the season.

All good things must come to an end sometime...so it is time to put an end to being a layabout and embrace 2013! I have been having a good tidy in my craft room. My need to tidy up the mess my room was in after the run up to Christmas has turned into a massive clean out and tidy I have been busy finding homes for my  Christmas pressies as well as new homes for some of the old supplies. Funny how we seem to spend as much time tidying and organizing as we do crafting!

Here is a shot of the work desk counter that I usually show you...quite a difference after my tidy!

Next is a picture of the rest of my work so far. It is taken from an angle I don't usually show. I am standing at the bottom of the basement stairs looking towards the back wall of my room. This area used to have a recliner  that has now been moved into our guest suite. DH turned his office into a TV/reading den so I inherited his filing cabinet and oak desktop. You are looking at the back of it. I was happy to get it as I now have enough seating to invite a 3rd girlfriend to our craft nights. I will keep my sewing machine on this desktop but need DH to carry it down 2 flights of stairs and he is nursing pulled ligaments at the moment. Once down here, I will be able to once again, sew on my cards.  The green lidded stacking bins underneath hold my hair flowers bits and bobs.

 Just behind the stacking green flower bins is a stack of three narrow plastic drawers that now hold most of my  Christmas card making supplies. Here is a picture of the other side of the "desktop" to show what I mean.

You can see the green plastic slim drawers to the left of the phto. They hold my Xmas 6x6 paper pads, journaling spots, Xmas themed mats, etc. The little rows of black drawers on the countertop (to the right of the desktop) are storing the more delicate odds and ends of Christmas embellishments. I plan on doing the Christmas card weekly challenges in 2013, so wanted to leave Christmas supplies handy. The brown basket perched on top of the tiny drawers holds the bling that I add to Xmas cards. There is a selection of the usual red, green, burgundy and diamond but also aqua, pink, pearls in a variety of colours and even a few fancy swirly bits. Back under the countertop, the white plastic bins with the floral paper inserts in the front of the drawers store my wooden stamps and my inks and acrylic blocks etc. I have three of these units under my counters and love them!

Hope you enjoyed the little tour and did you notice that I finally hung the garden scrapbook pages!!! If you wish to see other desktop  tours pop in to visit the lovely Julia at the Stamping Ground. She sponsors this whole bloghop, be sure to leave her some bloggy hugs.

Now time to go and make a creative mess. I have several card ideas buzzing about in my head...

Tuesday, 20 November 2012

WOYWW 181 - Same Desk; New Mess

Same Desk...new mess!

I am still a mess of Christmas bit s and bobs...but it is a new mess as I got sick of those other design papers so I pulled out some new ones!
I have all sorts of Xmas bits stored in all the containers I have out on my desk. Embellishments, stamped sentiments, snowflakes, bits of cards I have started and set aside over the years, fun pieces that I have pulled off old cards in the past,  etc. Yep, it is all there is a big messy heap. It is a little more organized than last week ,so I can actually manage to create a card here by pushing stuff over to the sides after I finish a card. As you can see, I am working on one right now. I am a bit stumped as I think that delicate aqua snowflake  border die is pretty with the Penny Black stickaroo ornament but I think the MERRY AND BRIGHT is too big and heavy in size to work with it.

Before you all say, what PB stickaroo???... the green ornament was from a PB stickaroo rectangle that got kind of dented in the Xmas snippet drawer. That drawer barely closes...my goal by the end of Xmas is to be able to slide that drawer open and shut without wrecking the contents at the top of the pile. I hate dented paper or stickers so I carefully trimmed away the white rectangle and kept the unblemished ornament in all its glory. I was trying to get a pretty contrast with the green and aqua...think I will ditch the MERRY AND BRIGHT and add a stamped sentiment directly on the card instead. I will have to hold my breath when I do it as I always manage to stamp crooked or have one tiny edge stamp lighter than the rest.

In case you are wondering why I am rambling on about my desk mess, check in at Julia"s wonderful blog Stamping ground and check out what all the other creative souls have on their desks this week. Make sure to leave her some bloggy hugs while you are there.

.

Tuesday, 13 November 2012

WOYWW 180 Hide your eyes, sister of mine!

In my family they think I am the organized one...wait till they see my desk today. Oh my!!!
The week has flown by and I am still a sea of Christmas and don't really want to put anything away till I finish up the series of cards I am making at the moment. I tend to work on one type of Christmas card till I either use up all those designer papers and images that I have readied, or till I am well and truly tired of them. I then do a general "quick tidy and move on to the next "type".
If you are sondering why I  am about to show you my messy desk, check out Julia at the Stamping Ground and take a look at all the creativity and mess going on around the world.  Leave Julia some nice bloggy hugs while you are there.

So here it is in all it's glory...me in a big mess. That countertop you are looking at is 12 feet long and I have filled all of it with the bits and bobs I have dragged out. You are seeing about a 5 feet section, it looks the same all across it!  I am working over on the left hand side of the room where the counter turns into a run of another 10 feet or so. All the computer, printer,
TV, cricut and cricut accessories are over on that side, so I am down to creating in an 18 inch by about 30 inch area!!!
Just down on the bottom edge of my counter top you can just barely see the little bits of leftover double sided tape I have stuck to the counter edge. I try to leave them there and then work with them as I require a piece about that size...teehee...I am such a cheapskate!

In spite of the mess I have been managing to actually finish some cards. I took a break today from the winter birds, to try my hand at a snowman card. This is where my poor sister has to cover her eyes as she dislikes snowmen...Sorry Sis! She just thinks there are so many more images that are less corny to put on a card.
Luckily I am only making one of this image!

I struggled with the black again...I really need to take a shading course...Little Miss C want me to take her too, so perhaps I should sign up both of us! I resolved the problem by stickling the hat brim to make it stand out from the top portion. I also stickled the scarf, broomstick and broom ties. It is Xmas after all! One last little bit of stickles on the snow on his hat and I called it a day.
 I am a bit undecided about 2 elements of this card. I originally placed clear diamond bling on the red snowflakes but it just sort of looked blah...like it blended in. I decided to put black glittered brads on instead and then after poked 2 of through, I discovered that I didn't have a 3rd! Yikes! I have placed a red diamond bling on the sentiment snowflake...I think I need to search a little harder or possible vacuum as I am sure I had 3 of those brads out.  The teensy little red diamond bling scattered across the polka dots are supposed to represent falling snow...perhaps I am reaching too far with this one...
Here is a close up...let me know what you think...Perhaps I should scatter them randomly right across the
top of the card so they are above the snowman too...

.

Recipe:
Card Base - Michaels, Recollections kraft corrugated cards and envelopes
Designer Paper - Michaels MME
Cardstock - Kraft, red and copic paper from my stash
Diecuts - Spellbinders deckle edge from my diecut papers stash and Spellbinders mall ovals for the sentiment
Border - black glettered border is from my wedding stash bin
Brads - black glitterd brads from my stash
Bling - Red diamonds from my stash
Punches - Martha Stewart snowflake punch  (the smaller sized flakes are the same punch but I gave them a hair cut
Stickles -Xmas red, black diamond, chrystal
Stamp - unknown rubber stamp
Sentiment - unknown rubber stamp
Large white snowflake is from the dollar store a few years ago, I have a bag full in my stash

I am entering this card in the following challenges:
1. Pixies Crafty Workshop   - I used lots of snippets, Di.
2.Clear It Out Challenge  Use something red from your stash - the red cardstock and the red diamonds were from my stash.
3.Craft Room Challenge - Punches and Diecuts - I used the Martha Stewart snowflake punch and the Spellbinders deckle edge die for the snowman cardstock.
4.Bunny Zoe Crafts Challenge - Winter
5. Songbird Challenges Diamonds...See some sparkle and bling I have stickles, glitter and red diamonds.
6.Christmas Card Challenges - Snowman
7.Quirky Crafts Challenge Blog - layer it up and let it snow
8. Penny Black and More @ Allsorts- Any die will do - I used a Spellbinders deckle edge die for the snowman image sheet. I also used a Spellbinders small oval for the sentiment


Tuesday, 6 November 2012

WOYWW 179 A Sea of Christmas!

Well, this week finds my workdesk finally cleared of the gardening cards and swept into a frenzy of Christmas bits and bobs.
There is a lot going on here today and I am busy trying to be organized in the midst of the Christmas excitement. Warning, this post is a bit picture heavy!
You are being greeted with a sea of stamped images...some stamped better than others...sigh...I seem to have an uneven hand at times...usually it is on the sentiments and today is no exception...hence the whole strip of sentiments to get maybe 2 good ones.


Just over to the right you can see some hot pink stripey photo albums...that is how I store my stamped images which have been already cut up into die cut shapes.


Here is a little peek into one of the stamped image albums.


Other albums contain snippets which are cut up into diecuts and filed away for later use. I cut dies for myself and for the evergrowing card making addiction of my little 6 yr old grand daughter,  Little Miss C. Sometimes even my girls will come and make a card. I like to have a hearty supply of dies,  it is just so much quicker and easier to make a card if you have supplies on hand.

So here is what is stored inside my little albums right now. I would like to eventually roll off dies cut and then do up each album by colour theme...pastels, white/ivory, primary, fall colours, etc But for now they are just cut and placed in a sleeve to protect them.


These next ones are full of the bits and bobs I have cut for my Christmas cards. I plan to bury myself in making Christmas cards for the month of November. I think I am going to have a lot of fun.


I even save the negative images as you can see below. Every now and again there is a challenge that asks for negatives...but I think I just like the look of them on certain cards.

On some fancy borders and corners, I even save the little cast off bits...like this...

I hope you enjoyed my tour today...and hopefully I haven't bored you to bits...pop back next week for some finished Christmas cards.

If you want to pop across and see what Little Miss C is up to, I have entered a post for her too, right behind me. Stop by the lovely Julia's blog to see all the other workdesks and make sure to leave her some bloggy  hugs http://stamping-ground.blogspot.ca/


Tuesday, 30 October 2012

WOYWW 178

Finally! It is Wednesday in England.........Spooky time!
Soon to be a time for all sorts of scary creatures to be ringing my doorbell! Ringing it about 150 to 200 times I might add! Some years we have had close to 300 and others around 150 to 180 little trick or treaters. The costumes are usually fabulous and the kids so well mannered...I love Halloween!

My desk is pretty bare.I finally finished the gardening cards and so have cleaned up to have it ready for my next project...making little gift bags for the grandkids candy.  My daughter has scolded me about the amount of chocolate bars we gave on previous years...so we are under strict orders to rein it in this year.

 I think she will be happy...there is just enough room for a full size bag of Smarties, a full size Hershey's chocolate bar, and a few little  mini chocolate bars. I think they look kind of chintzy but she will think it is just right! Here is a close up...you can see the fabulous spooky card my neighbour brought me this morning. She was able to drop by for a really quick cup of coffee before rushing to pick up her little guy at preschool. Such a treat to have coffee with a friend.
Some people have asked about the clear drawers against the wall. They are square glass jars with silver push on lids...they are from the dollar store (Dollarama) and were only $1.25 each. Sadly, they are discontinued as I would like a ton more of the smaller size.
They are full of ribbon scraps, twine, jute, and flowers.....tons of flowers.  In 2013, my goal is to make a ton of cards that feature flowers as many of them are quite out of style and need to be "remade" into something a bit more stylish. A little stacking of various layers, a little inking, a few pearls, some scrunching and maybeI can transform some of the ugly duckling flowers into swans.

If you want to peek into a few more desks, swing by our hostess Julia's   http://stamping-ground.blogspot.ca/  but don't forget to leave her some bloggy hugs!!!

Tuesday, 23 October 2012

WOYWW 177

Oh my goodness...surely it hasn't been a week already!

My desk is still covered with teensy, weensy, fussy cut, bits and bobs of gardening themed papers. I am proud to say that there are not quite so many of them as there were last week!

Somehow, I have managed to finish up 3 cards and almost have a 4th one ready to glue. There are a zillion scraps of other diecuts etc but I am not bothering to clean them up till I have 2 more gardening cards finished!!! Hopefully, I get some time again tomorrow to do just that

This was a good project to regain my mojo...I finally have a few card ideas racing around in my brain...anxious to be put to the test with cardstock and designer paper. I've got to get them made as they will all be bumping into each other soon...My brain is not all that big, you know!

I think I have won a Scrappymo! record for this being my shortest WOYWW post ever:) Julia will be proud of me for following the rules. If you are wondering what I am rambling on about, check out Julia's blog  http://stamping-ground.blogspot.ca/ and see just what all the other creative crafters have on their workdesks too!l

Tuesday, 16 October 2012

WOYWW 176 - Finally have a desk to show!

I have been home 9 days now and finally feeling like creating a bit. The organized bins and stacks of supplies that I set up in the right hand corner, are still there untouched since in set them up in late Sept.

I have pulled some kraft cards and now I am busy pairing it up with some designer papers. I feel in the mood to make up a few  gardening themed cards. Luckily I have some glittery papers with bulbs, wellies, tools, wheelbarrows and baskets. I have fussy cut a few of these out last night...now to get my mojo working!
My two framed layouts are still not hung up.  I need my handy daughter to pop over and hang them up for me. They are just a titch further than I can reach at the moment.


Once healed, I am determined to rejoin the garden club. These cards will be to donate to the draw that they hold each month to help cover the hall costs. They are easy to make up as I will keep them simple. Best of all, I don't feel too much stress about my mojo being a bit off as these are going to gardeners, not card makers!!! lol

If you are wondering why I am sharing my desk and all it's clutter, pop on over to the lovely Julia's blog http://stamping-ground.blogspot.ca/  and check out what all the other crafters are doing. Be sure to leave some bloggy hugs!