I finally managed to make a card. It seems so long since I spent a little time with card stock and paper.
Last night I went to a crop at my friend Gloria's house and managed to make 8 cards...so finally have something to share...lol Gloria puts on a lovely crop once a month, from 4 till 10 pm...sometimes even later! She always has a wonderful meal prepared and we all take turns bringing desert and side dishes. It is so much fun to spend time with other crafters and all the creativity in the room is inspiring.
This fortnight was Rita from RMG Creations turn to chose the theme for the Christmas Card Club and she chose Christmas Reindeer. I decided to use my Wild Rose Studio deer topper for this theme, as I just love their reindeer toppers
I kept my card fairly simple as I made up card kits for the crop, and they were fairly basic kits at that.
My theory was to get as many cards made as possible and then take them home to add any extra embellishments, if necessary
The scalloped card base is from England,, and the patterned paper is a snippet from a RAK I won last year from Ali Wynn @ Two Peas. The snippet of red card, as well as the snippet of beige embossed card, were found when sorting and organizing my room in preparation for the upcoming move. I just had two teensy pieces of the beige, but slid them under the main image and hoped for the best.
The bit of 3D ivy at the top left corner is K and Co as well as the wee presents in the bottom right corner. The sentiment is a rub on...BoBunny I think.
I am entering this card in the following challenges:
1. Pixies Crafty Workshop - must use snippets
2. Christmas Card Club - Christmas Reindeer
3. Crafty Hazelnut's Christmas Challenge Extra - always anything Christmas
4. Crafty Hazelnut's Christmas Challenge - Use something forgotten or unused (I used the beige embossed cardstock which had been packed up in an old kit bag, and forgotten for a couple of years)
Showing posts with label CKC. Show all posts
Sunday, 19 October 2014
Saturday, 12 July 2014
Christmas Card Club - Teddy Bear (card 41)
This fortnight is was Sue P's turn to chose the theme for our little Christmas Card Club. She chose such a fun one...Christmas Teddy Bears. I have tried to make the best of it but my card is on the plain side. I may just have to jazz it up a bit once I am home again.
I am up at the lake and made this from the bits and bobs that were left up here from our last few visits.
I did not realize how little DP I had left here. Basically I had a wee bit of Xmas DP , a snippet of brown card, and a couple of felt embellishments. No diecuts, no stamps, no image and no ribbon! Silly me...
Thank goodness, I did manage to find 3 square cream coloured cards.
So from a fat lot of nothing, my very basic card emerged. With a decided lack of dies of any sort, I free form cut the first layer, a snippet of burgundy poinsettia DP. I tried to keep the edges random as I did not have a guillotine with me either.
I had an old birthday card that I managed to pilfer the teddy bear image from. I free form cut the bear image off it and then did the same to create a brown mat. I cut up one of the extra square cards, just to create a cream mat to help the image pop a bit off the paper.
With that done, I now had a birthday bear on a Xmas background. I placed the felt Xmas wreath in his paw and cut two tips off some felt branches...now they looked like felt corner pieces!
Whew! Now my birthday bear looked a little more like Xmas...
I thought I was going to have to hand write a sentiment, but I found a snippet of Christmas word DP and fussy cut out "Merry Christmas".
Finally...my Xmas teddy bear card was done and dusted. In retrospect, I wish I had roughed up the edges of the image and of the layers of matting and DP! Oh well... I may try to add some bling once home...perhaps outline the edges of the random cutting with generous lines of stickles!
****************This is card #41 of 50. I have been on a consumables spending freeze until I made 50 cards (Sook Wang tape and heavy weight card stock exempt).***************
I am entering this card in the following challenges:
1. Christmas Card Club - Teddy Bear theme
2. MFP Speedy TV Christmas Card Challenge - must be Christmas
3. Pixies Crafty Workshop - must use snippets
4. Crafty Hazelnut's Patterned Paper Challenge - must cover card with paper
5. Crafty Hazelnut's Christmas Challenge Extra - must be Christmas
I am up at the lake and made this from the bits and bobs that were left up here from our last few visits.
I did not realize how little DP I had left here. Basically I had a wee bit of Xmas DP , a snippet of brown card, and a couple of felt embellishments. No diecuts, no stamps, no image and no ribbon! Silly me...
Thank goodness, I did manage to find 3 square cream coloured cards.
So from a fat lot of nothing, my very basic card emerged. With a decided lack of dies of any sort, I free form cut the first layer, a snippet of burgundy poinsettia DP. I tried to keep the edges random as I did not have a guillotine with me either.
I had an old birthday card that I managed to pilfer the teddy bear image from. I free form cut the bear image off it and then did the same to create a brown mat. I cut up one of the extra square cards, just to create a cream mat to help the image pop a bit off the paper.
With that done, I now had a birthday bear on a Xmas background. I placed the felt Xmas wreath in his paw and cut two tips off some felt branches...now they looked like felt corner pieces!
Whew! Now my birthday bear looked a little more like Xmas...
I thought I was going to have to hand write a sentiment, but I found a snippet of Christmas word DP and fussy cut out "Merry Christmas".
Finally...my Xmas teddy bear card was done and dusted. In retrospect, I wish I had roughed up the edges of the image and of the layers of matting and DP! Oh well... I may try to add some bling once home...perhaps outline the edges of the random cutting with generous lines of stickles!
****************This is card #41 of 50. I have been on a consumables spending freeze until I made 50 cards (Sook Wang tape and heavy weight card stock exempt).***************
I am entering this card in the following challenges:
1. Christmas Card Club - Teddy Bear theme
2. MFP Speedy TV Christmas Card Challenge - must be Christmas
3. Pixies Crafty Workshop - must use snippets
4. Crafty Hazelnut's Patterned Paper Challenge - must cover card with paper
5. Crafty Hazelnut's Christmas Challenge Extra - must be Christmas
Saturday, 28 June 2014
Christmas Card Club - Angels (Stash Card 34)
It is my turn to host the fortnightly theme for the Christmas Card Club. I chose Angels and had a specific angel stamp in mind. It is specific all right...it is my only angel stamp!
It has never seen ink and I had grand ideas to heat emboss it in silver on a navy blue sky.
Well, I have searched high and low and can not find it. I have the stamp package and all the other stamps are there, but the angel is missing. Sadly, I believe I have loaned it out and of course have forgotten who I loaned it too.
In my search, I did manage to find this lovely angel, up cycled from an old Xmas card. I decided to use it as it is already what I had in mind... An angel in the night sky! The card had some lovely gold metallic embossed patterns on it so it looks quite sparkly.
I have matted in pearlescent purple as I have a couple of friends who love that colour. I added a Memory Box snowflake border from a snippet of the purple card, and added a few gold pearls to finish it off. I had a few teensy snippets leftover and cut Believe from my Tattered Lace die. It fit quite nicely on my angels robe and serves as my sentiment. I added a bit of gold fine cord just below the matted image, to tie in the metallic finish on the paper.
Recipe
Card base - cut from my stash
Card stock -snippet of purple pearlescent card
DP - Authentique, Glistening; from my stash
Cord -fine gold metallic cord from my stash
Dies - Memory Box snowflake border; Tattered Lace die words phrases (Believe)
Image -up cycled from an old Xmas card
I am entering this card in the following challenges
1. Pixies Crafty Workplace - must use snippets
2. Christmas Card Club - use theme of Angels
It has never seen ink and I had grand ideas to heat emboss it in silver on a navy blue sky.
Well, I have searched high and low and can not find it. I have the stamp package and all the other stamps are there, but the angel is missing. Sadly, I believe I have loaned it out and of course have forgotten who I loaned it too.
In my search, I did manage to find this lovely angel, up cycled from an old Xmas card. I decided to use it as it is already what I had in mind... An angel in the night sky! The card had some lovely gold metallic embossed patterns on it so it looks quite sparkly.
I have matted in pearlescent purple as I have a couple of friends who love that colour. I added a Memory Box snowflake border from a snippet of the purple card, and added a few gold pearls to finish it off. I had a few teensy snippets leftover and cut Believe from my Tattered Lace die. It fit quite nicely on my angels robe and serves as my sentiment. I added a bit of gold fine cord just below the matted image, to tie in the metallic finish on the paper.
Recipe
Card base - cut from my stash
Card stock -snippet of purple pearlescent card
DP - Authentique, Glistening; from my stash
Cord -fine gold metallic cord from my stash
Dies - Memory Box snowflake border; Tattered Lace die words phrases (Believe)
Image -up cycled from an old Xmas card
I am entering this card in the following challenges
1. Pixies Crafty Workplace - must use snippets
2. Christmas Card Club - use theme of Angels
Saturday, 31 May 2014
Christmas Card Club - Nativity Scene Card 50
It is Sue J at Olliesmam 's turn to choose the theme for our Christmas Card Club. Sue chose Nativity Cards as our theme this fortnight. This is a great theme for me as I like to make a religious themed card that captures the true spirit of Christmas. So thanks for this great challenge, Sue! If you would like to check out the other girl's cards, the links are on my right sidebar.
My mojo was a wee bit tired...so I took my inspiration from this card on Taylored Expressions blog.
I did not have that exact ribbon on hand and remember that I have not been purchasing consumables...so I used what I had on hand. This was a very enjoyable card to make as I think it captures the true meaning of Christmas! Thanks again Sue J for the wonderful theme this fortnight.
Here is my take on the pinterest card...
I am skipping this card number ahead of my other finished cards posts as I wanted to be able to share with you that this in my 50th card! 50 cards without purchasing any consumables was quite easy to do. I even went to the scrapbook shops a few times...bought a couple of dies and a stamp for a friend. I did purchase my exceptions... Sook Wang tape and the heavy weight paper that I usually cut my cards from. I managed to get both for 40% off so that was a bonus.
I did not actually use much of that paper as I decided to try and make an effort to use the precut, folded card sets that I have on hand. They are thinner and flimsier, but that does allow some leeway for adding embellishments and still getting the card through the regular mail slot! Once I use these thinner cards up, I will switch back to cutting my own cards as I sure like the look and feel of the heavier weight paper!
I am going to come out of the freezer tomorrow for one day. It is the scrapbook store's garage sale. Bargains abound at these sales and I plan to shop there tomorrow. The shop itself has 25% off everything in the store for the day. I plan to purchase some Memory Box dies and perhaps a new style Spellbinders set. Then I am placing myself right back in the freezer until I make 50 more paper projects! Stay tuned to this blog for my next 29 posts and you will have seen all of this first 50!!!
****************This is card #50 of 50. I am on a consumables spending freeze until I have made 50 cards (Sook Wang tape and heavy weight card stock are exempt).***************
Recipe
Card Base and Envelope - from my stash
Card Stock - snippets of Kraft and white
Stamp - Stampendous, manger
Ribbon - twill ribbon from stash
Twine - snippet of jute twine
I am entering this card in the following challenges:
1. Pixies Crafty Workshop - must use snippets
2. Crafty Hazelnut's Christmas Challenge Extra - must be Christmas
3. MFP Speedy TV Christmas Card Challenge - must be Christmas
4. Two Peas In A Bucket - Christmas in June - must be Christmas
5. Christmas Card Club - must be Christmas
My mojo was a wee bit tired...so I took my inspiration from this card on Taylored Expressions blog.
I did not have that exact ribbon on hand and remember that I have not been purchasing consumables...so I used what I had on hand. This was a very enjoyable card to make as I think it captures the true meaning of Christmas! Thanks again Sue J for the wonderful theme this fortnight.
Here is my take on the pinterest card...
I am skipping this card number ahead of my other finished cards posts as I wanted to be able to share with you that this in my 50th card! 50 cards without purchasing any consumables was quite easy to do. I even went to the scrapbook shops a few times...bought a couple of dies and a stamp for a friend. I did purchase my exceptions... Sook Wang tape and the heavy weight paper that I usually cut my cards from. I managed to get both for 40% off so that was a bonus.
I did not actually use much of that paper as I decided to try and make an effort to use the precut, folded card sets that I have on hand. They are thinner and flimsier, but that does allow some leeway for adding embellishments and still getting the card through the regular mail slot! Once I use these thinner cards up, I will switch back to cutting my own cards as I sure like the look and feel of the heavier weight paper!
I am going to come out of the freezer tomorrow for one day. It is the scrapbook store's garage sale. Bargains abound at these sales and I plan to shop there tomorrow. The shop itself has 25% off everything in the store for the day. I plan to purchase some Memory Box dies and perhaps a new style Spellbinders set. Then I am placing myself right back in the freezer until I make 50 more paper projects! Stay tuned to this blog for my next 29 posts and you will have seen all of this first 50!!!
****************This is card #50 of 50. I am on a consumables spending freeze until I have made 50 cards (Sook Wang tape and heavy weight card stock are exempt).***************
Recipe
Card Base and Envelope - from my stash
Card Stock - snippets of Kraft and white
Stamp - Stampendous, manger
Ribbon - twill ribbon from stash
Twine - snippet of jute twine
I am entering this card in the following challenges:
1. Pixies Crafty Workshop - must use snippets
2. Crafty Hazelnut's Christmas Challenge Extra - must be Christmas
3. MFP Speedy TV Christmas Card Challenge - must be Christmas
4. Two Peas In A Bucket - Christmas in June - must be Christmas
5. Christmas Card Club - must be Christmas
Saturday, 29 March 2014
Christmas Card Club - Cute Christmas
I am dedicating this post to Lorraine, who chose the "Cute Christmas" theme for this fortnight.
I am so glad we will be all making such cute and cheery cards as Lorraine has left us...hopefully, only for a short time. Hope you see these posts Lorraine and have a wee smile at the barrage of cuteness!
Around the middle of January 2013, my local scrapbook store had a 75% off Christmas sale. I picked up a set of stamps and matching dies. This little fellow was one of them! I thought he would look cute on a card or a tag.
I had some snippets of Studio Calico Take Note that looked like the pattern of an igloo and some other random snippets in the colours of the March Moodboard at Two Peas in a Bucket. So I decided to stick with that colour scheme for my card. It was fun as it helped speed up the selection process....sometimes I can get bogged down choosing. lol
I inked up the edges of the DP with some black ink, and then added a snippet of Prima Devine to which I added a K&Co black glittered border (leftover from a wedding album I made last year). I placed my stamped and diecut penguin over the border and tucked the sentiment up in the top right.
I had some 3D tree cut out from a RAK I won. I used them to tie in the green shades from the moodboard. They are a bit brighter than the moodboard but they work for me. I balance the card with a flurry of snowflakes from Inkadinkadoo. I stamped them with versamark and embossed them with a silver EP. I felt like it looked bare so I looped some fine silver card and glued it on top of the snowflake image. A K&Co snowflake from my stash, hid the glue.
I used a bunch of varying colours and sizes of blue diamonds to highlight here and there.
Here is a photo of the inside...
Recipe:
Card base and envelope - from my stash
DP - snippets of Studio Calico Take Note from my stash, and a thin strip of Prima Devine for the bit under the border. Green dotted paper is an unknown snippet
Border - K&Co black glittered border
Bling - blue diamonds from my stash
Cord - fine silver cord from my stash
Stamps - Iinkadinkadoo Snowflakes; Sizzix Penguin stamp
Die cut- Sizzix Penguin, Spellbinders snowflake (inside)
Sentiment chalkboard - Heidi Swap
3D tree stickers - Doodlebug
I am entering this card in the following challenges:
1. Pixies Crafty Workshop - must use snippets
2. Crafty Hazelnuts Christmas Challenge Extra - must be Christmas, anything goesl
3. Crafty Hazelnut's Patterned Paper Challenge - must cover card front with paper
4. MFP Speedy TV Christmas Card Challenge - must be Christmas
5. Two Peas In A Bucket - March Moodboard Challenge
6.. Christmas Card Club - Cute Christmas
I am so glad we will be all making such cute and cheery cards as Lorraine has left us...hopefully, only for a short time. Hope you see these posts Lorraine and have a wee smile at the barrage of cuteness!
Around the middle of January 2013, my local scrapbook store had a 75% off Christmas sale. I picked up a set of stamps and matching dies. This little fellow was one of them! I thought he would look cute on a card or a tag.
I had some snippets of Studio Calico Take Note that looked like the pattern of an igloo and some other random snippets in the colours of the March Moodboard at Two Peas in a Bucket. So I decided to stick with that colour scheme for my card. It was fun as it helped speed up the selection process....sometimes I can get bogged down choosing. lol
I inked up the edges of the DP with some black ink, and then added a snippet of Prima Devine to which I added a K&Co black glittered border (leftover from a wedding album I made last year). I placed my stamped and diecut penguin over the border and tucked the sentiment up in the top right.
I had some 3D tree cut out from a RAK I won. I used them to tie in the green shades from the moodboard. They are a bit brighter than the moodboard but they work for me. I balance the card with a flurry of snowflakes from Inkadinkadoo. I stamped them with versamark and embossed them with a silver EP. I felt like it looked bare so I looped some fine silver card and glued it on top of the snowflake image. A K&Co snowflake from my stash, hid the glue.
I used a bunch of varying colours and sizes of blue diamonds to highlight here and there.
Here is a photo of the inside...
Recipe:
Card base and envelope - from my stash
DP - snippets of Studio Calico Take Note from my stash, and a thin strip of Prima Devine for the bit under the border. Green dotted paper is an unknown snippet
Border - K&Co black glittered border
Bling - blue diamonds from my stash
Cord - fine silver cord from my stash
Stamps - Iinkadinkadoo Snowflakes; Sizzix Penguin stamp
Die cut- Sizzix Penguin, Spellbinders snowflake (inside)
Sentiment chalkboard - Heidi Swap
3D tree stickers - Doodlebug
I am entering this card in the following challenges:
1. Pixies Crafty Workshop - must use snippets
2. Crafty Hazelnuts Christmas Challenge Extra - must be Christmas, anything goesl
3. Crafty Hazelnut's Patterned Paper Challenge - must cover card front with paper
4. MFP Speedy TV Christmas Card Challenge - must be Christmas
5. Two Peas In A Bucket - March Moodboard Challenge
6.. Christmas Card Club - Cute Christmas
Saturday, 15 March 2014
Christmas Card Club - Feature Wings
It is Christine's @ Christine's Cards and Crafts turn to chose a theme for our fortnightly Christmas Card club. She chose Winged Creations and this one was really fun!
I am off to my Mum's house tomorrow, so needed to make my card ahead and auto schedule it...hope it works! This card was made at my weekly craft day with my neighbour....we made 3 cards and had a lot of fun. I made sure I added a winged creature as I had my looming club commitment in mind.
DP is Bella Blvd, Winter Wonder Blizzard...I quite like those multi-coloured snowflakes. Added another layer of what I think is MME blue dotted DP, after carefully wrapping a snippet of dotted ribbon around it.
Lisa and I are good friends so she called the night before and asked me to cut some large glitter paper snowflakes...so these are Memory Box snowflakes. The gorgeous jewel in the center is from a package of jewels that Lisa had in her stash. The little snowflakes are random ones from packages that have long since lost their labels. I added the wee owl embellishment as my "wings" commitment item and added the word JOY beside it. Joy is another ready cut embellishment from Lisa's stash.
Since I thought it all looked a little too plain, I added some small blue diamonds and tried to place them on every other snowflake tip and then placed the remainder a bit further down the flake. Couple more red diamonds on the sides and the front was done.
Inside is a sheet of matching card and a sentiment I cut off one of the Chritmas cards we received last year! I added a banner flag to tie in the DP from the front. I will skip the recipe as I have already listed all the ingredients in this post!
Here is a close up of the snowflake.
I am entering this card in the following challenges:
1. Pixies Crafty Workshop - must use snippets
2. Crafty Hazelnuts Christmas Challenge Extra - Anything goes, as long as it is Christmas
3. Crafty Hazelnuts Patterned Paper Challenge - must cover card front with paper
4. Completely Christmas Challenge # 3 - Anything (Christmas) Goes
I am off to my Mum's house tomorrow, so needed to make my card ahead and auto schedule it...hope it works! This card was made at my weekly craft day with my neighbour....we made 3 cards and had a lot of fun. I made sure I added a winged creature as I had my looming club commitment in mind.
DP is Bella Blvd, Winter Wonder Blizzard...I quite like those multi-coloured snowflakes. Added another layer of what I think is MME blue dotted DP, after carefully wrapping a snippet of dotted ribbon around it.
Lisa and I are good friends so she called the night before and asked me to cut some large glitter paper snowflakes...so these are Memory Box snowflakes. The gorgeous jewel in the center is from a package of jewels that Lisa had in her stash. The little snowflakes are random ones from packages that have long since lost their labels. I added the wee owl embellishment as my "wings" commitment item and added the word JOY beside it. Joy is another ready cut embellishment from Lisa's stash.
Since I thought it all looked a little too plain, I added some small blue diamonds and tried to place them on every other snowflake tip and then placed the remainder a bit further down the flake. Couple more red diamonds on the sides and the front was done.
Inside is a sheet of matching card and a sentiment I cut off one of the Chritmas cards we received last year! I added a banner flag to tie in the DP from the front. I will skip the recipe as I have already listed all the ingredients in this post!
Here is a close up of the snowflake.
I am entering this card in the following challenges:
1. Pixies Crafty Workshop - must use snippets
2. Crafty Hazelnuts Christmas Challenge Extra - Anything goes, as long as it is Christmas
3. Crafty Hazelnuts Patterned Paper Challenge - must cover card front with paper
4. Completely Christmas Challenge # 3 - Anything (Christmas) Goes
Sunday, 16 February 2014
Christmas Card Club Snowflakes or White on White
Hazel chose the theme this fortnight for the Christmas Card Club. I knew I would use the snowflake theme as I wanted to use my Impression Obsession dies. I have their large and small snowflake dies and I just love them. They cut like a dream and release from the die very easily.
I have seen this Merry Christmas Memory Box die on many Christmas cards posts this year. I always manage to find it sold out when I check in my local scrapbook stores. When I was out shopping a couple of weeks ago, I found it at a store I don't visit that often. So between christening my new die and the snowflake collection, my card design was done.
I added lashings of stickles to make up for the lack of patterned paper...Somehow it seemed bare till I painted each snowflake layer with Stardust stickles. Here is a close up to help you see the sparkle. The red shade on this closeup is the true red of my card. For some reason ,every shot I took of the total card showed the red incorrectly.
I have a funny confession to make. I hope you will think it is a giggle...I can't show you the inside of my card because I glued the card upside down!!! Yep, the fold is at the bottom of the card I have propped up. I need to find a larger card to mount this one onto...My 12x12 card stock is not a heavy enough weight and the local shops do not sell this size. I think the shop I found the die at has a larger selection of card sizes, so will check there...when I get over that way.
Recipe:
Upside down card base - 5 1/2 textured square card and envelope from my stash
Dies - Memory Box Merry Christmas (first time used)
Dies - Impression Obsession Die 100F, small snowflakes; and Die 024X. large snowflakes
Bling - large and small diamonds from my stash
Stickles - Stardust
Card stock - snippets of red and white card, from my stash
I am entering this card in the following challenges;
1. Pixies Crafty Workshop - must use snippets
2. MFP Speedy TV Christmas Card Challenge - must be Christmas
3. Christams Card Club - must be snowflakes or white on white
I have seen this Merry Christmas Memory Box die on many Christmas cards posts this year. I always manage to find it sold out when I check in my local scrapbook stores. When I was out shopping a couple of weeks ago, I found it at a store I don't visit that often. So between christening my new die and the snowflake collection, my card design was done.
I have a funny confession to make. I hope you will think it is a giggle...I can't show you the inside of my card because I glued the card upside down!!! Yep, the fold is at the bottom of the card I have propped up. I need to find a larger card to mount this one onto...My 12x12 card stock is not a heavy enough weight and the local shops do not sell this size. I think the shop I found the die at has a larger selection of card sizes, so will check there...when I get over that way.
Recipe:
Upside down card base - 5 1/2 textured square card and envelope from my stash
Dies - Memory Box Merry Christmas (first time used)
Dies - Impression Obsession Die 100F, small snowflakes; and Die 024X. large snowflakes
Bling - large and small diamonds from my stash
Stickles - Stardust
Card stock - snippets of red and white card, from my stash
I am entering this card in the following challenges;
1. Pixies Crafty Workshop - must use snippets
2. MFP Speedy TV Christmas Card Challenge - must be Christmas
3. Christams Card Club - must be snowflakes or white on white
Sunday, 5 January 2014
Christmas Card Club - First card of 2014
This is my first card of 2014! It is for the Christmas Card Club and Sylvie at Gibmiss chose the theme for this fortnight. It is Anything Goes, as long as it is Christmas.
Now I know it is a New Year and it may seem a little strange to see Christmas cards again so soon...But in order to have all my Christmas cards finished for next year, it is better to get cracking on!
Our newish laptop picked up a virus that somehow got past the Norton Antivirus installed at the store when we bought it. Luckily, it was all under warranty, but I have not had a computer for a few days. Instead of blogging, I spent the last couple of days sorting my 12x12 scrapbooking design paper. It is amazing how many of these patterns are suitable for cards. I was able to move several full sheets as well as several large snippets, over to the area I have set up as the Christmas Creations Station in my room.
This card was created from one of those sheets. I thought it was fitting to use some non traditional colours since it is still so early in the year. IRL this paper has very salmon, cream and muddy green tones. The camera flash has drained the colour on the top left but that whole top area is greenish like it is on the right. As soon as I saw the page, I remembered that I still had one K & Co Father Christmas 3D sticker in my stash. I thought it would be rather fitting in light of the Santa Season sentiment on the DP.
Quite some time ago, I coloured up a half dozen of the poinsettia images. I coloured each one in slightly different shades and colours. Luckily I one left that had some salmony undertones. After choosing these elements, the card came together rather quickly. Due to the unusual Christmas colours, I had originally filed the DP with some coordinating cardstock. So it really was only a matter of placing everything together. I did plan to add some other elements...perhaps snowflakes or even a florish...but everything I added looked contrived somehow, so I decided to leave it as is.
In keeping with my 2014 goal to finish the inside of my cards when I make them, I decided to make this card a notecard. I finished the inside flap and left the inside blank so I have room to write a small letter. That way I will not be trying to write over the lumpy card elements! I can now write on the smooth inside and the back flap too.
Recipe
Card base and envelope - from my stash, white textured square card
DP - DELish INdulge Series, Seasoning Buffet from my stash
Cardstock - snippets of Wild Asparagus,Hope Dots/Lime; and snippets of MME 29th Market Bright Buddy Boy, Little Jack's Engine Paper; both from my stash
3D Sticker - K&Co Father Christmas, from my stash
Stickles - Stardust, from my stash
I am entering this card in the following challenges:
1. Pixies Crafty Workshop - must use snippets
2. CHNC Extra - Anything Goes as long as it is Christmas
3. Marks Finest Papers Speedy TV Christmas Card Challenge - must be Christmas
4. Christmas Card Club - Anything Goes, must be Christmas
5. Allsorts - Free and Easy
Now I know it is a New Year and it may seem a little strange to see Christmas cards again so soon...But in order to have all my Christmas cards finished for next year, it is better to get cracking on!
Our newish laptop picked up a virus that somehow got past the Norton Antivirus installed at the store when we bought it. Luckily, it was all under warranty, but I have not had a computer for a few days. Instead of blogging, I spent the last couple of days sorting my 12x12 scrapbooking design paper. It is amazing how many of these patterns are suitable for cards. I was able to move several full sheets as well as several large snippets, over to the area I have set up as the Christmas Creations Station in my room.
This card was created from one of those sheets. I thought it was fitting to use some non traditional colours since it is still so early in the year. IRL this paper has very salmon, cream and muddy green tones. The camera flash has drained the colour on the top left but that whole top area is greenish like it is on the right. As soon as I saw the page, I remembered that I still had one K & Co Father Christmas 3D sticker in my stash. I thought it would be rather fitting in light of the Santa Season sentiment on the DP.
Quite some time ago, I coloured up a half dozen of the poinsettia images. I coloured each one in slightly different shades and colours. Luckily I one left that had some salmony undertones. After choosing these elements, the card came together rather quickly. Due to the unusual Christmas colours, I had originally filed the DP with some coordinating cardstock. So it really was only a matter of placing everything together. I did plan to add some other elements...perhaps snowflakes or even a florish...but everything I added looked contrived somehow, so I decided to leave it as is.
In keeping with my 2014 goal to finish the inside of my cards when I make them, I decided to make this card a notecard. I finished the inside flap and left the inside blank so I have room to write a small letter. That way I will not be trying to write over the lumpy card elements! I can now write on the smooth inside and the back flap too.
Recipe
Card base and envelope - from my stash, white textured square card
DP - DELish INdulge Series, Seasoning Buffet from my stash
Cardstock - snippets of Wild Asparagus,Hope Dots/Lime; and snippets of MME 29th Market Bright Buddy Boy, Little Jack's Engine Paper; both from my stash
3D Sticker - K&Co Father Christmas, from my stash
Stickles - Stardust, from my stash
I am entering this card in the following challenges:
1. Pixies Crafty Workshop - must use snippets
2. CHNC Extra - Anything Goes as long as it is Christmas
3. Marks Finest Papers Speedy TV Christmas Card Challenge - must be Christmas
4. Christmas Card Club - Anything Goes, must be Christmas
5. Allsorts - Free and Easy
Tuesday, 17 January 2012
A Few Of My Favourite Things - 2nd January Counterfeit Kit
I loved the Xmas kit that was featured (and promptly removed) from the Cocoa Daisy January kit. I played around with my stash and came up with my version...I am calling it A Few Of My Favourite Things. I plan to use it for some layouts about my favourite Christmas ornaments and Christmas vignettes.
I do have some ideas to include some pictures of little Miss C's ballet recital so I threw in a second small Pink kit. Thankfully there is a bit of red/ivory and aqua on some of the pages as little Mr P would like a boyish layout about singing Xmas carols with me, on our Tuesday walks.
Our snow finally arrived on Saturday night so perhaps I can even use some of this kit for layouts of the grandkids playing and walking in the snow. I will combine elements of the 2 Xmas kits if needed, but for now am calling this pink one, Christmas Kids.Monday, 9 January 2012
January Counterfeit Kit Challenge
It's time to get my kit on!!! My counterfeit kit that is. The Counterfeit Kit Challenge is up and running with their January challenge. This month we are counterfeiting Cocoa Daisy. You can see the kits here.http://counterfeitkitchallenge.blogspot.com/2012/01/january-2012-kit-reveal.html
I love participating in this challenge. I get to create beautiful kits from shopping within my own stash and I get fab tutorials and idea links every month.
At first, nothing called out to me as I tried to chose which of the 4 Cocoa Daisy kits to copy...then I saw the patterned paper with the chair motif. As soon as I spied it, I wanted to create a kit for layouts of all the remodelling we did on our house and the new furniture we purchased in 2011. We still have to add little decorative accents in the rooms to help pull it all together but that is the plan for 2012!

I love participating in this challenge. I get to create beautiful kits from shopping within my own stash and I get fab tutorials and idea links every month.
At first, nothing called out to me as I tried to chose which of the 4 Cocoa Daisy kits to copy...then I saw the patterned paper with the chair motif. As soon as I spied it, I wanted to create a kit for layouts of all the remodelling we did on our house and the new furniture we purchased in 2011. We still have to add little decorative accents in the rooms to help pull it all together but that is the plan for 2012!
Here is my take on the Cocoa Daisy kits...I have called it "Come on in and relax". I chose the browns and greyish aqua papers as those are the colours of my rooms. I have added a rusty red page as I want to accessorize our living/dining room with aqua and red. Dh hates red so I figure I will show him how great red will look via my layouts! I think I will call it rust though, instead of red...to help get him on board!!!
Wednesday, 27 April 2011
April Counterfeit Kit Blog Hop
Welcome to the April Counterfeit Kit Challenge Blog Hop. If you are just joining us or got lost along the way, you can start this blog hop at http://counterfeitkitchallenge.blogspot.com/. This months challenge was to find inspiration from a Counterfeit Kit Design Team members blog. What fun it was paging back through all these blogs!
I was inspired by Crystal at Crafting for Caitlyn, specifically her March 11th layout, Trash 2 Treasure. You can see it here at https://blogger.googleusercontent.com/img/b/R29vZ2xl/AVvXsEjihU6XJ7H25KbFZR6JHyCiErgoPchMvYPvktjt6je_piJg9u2bUL6s03porzPWVbQYX0HvndQ6uIGTOtPdZyjYydktpUXGbjHhc6qfyDjSliKmp1FtACOAa5wEKPGNZUdBtwlV-db7UHJx/s1600/P1250319.JPG I really liked the use of the burlap on the center of her flowers. .
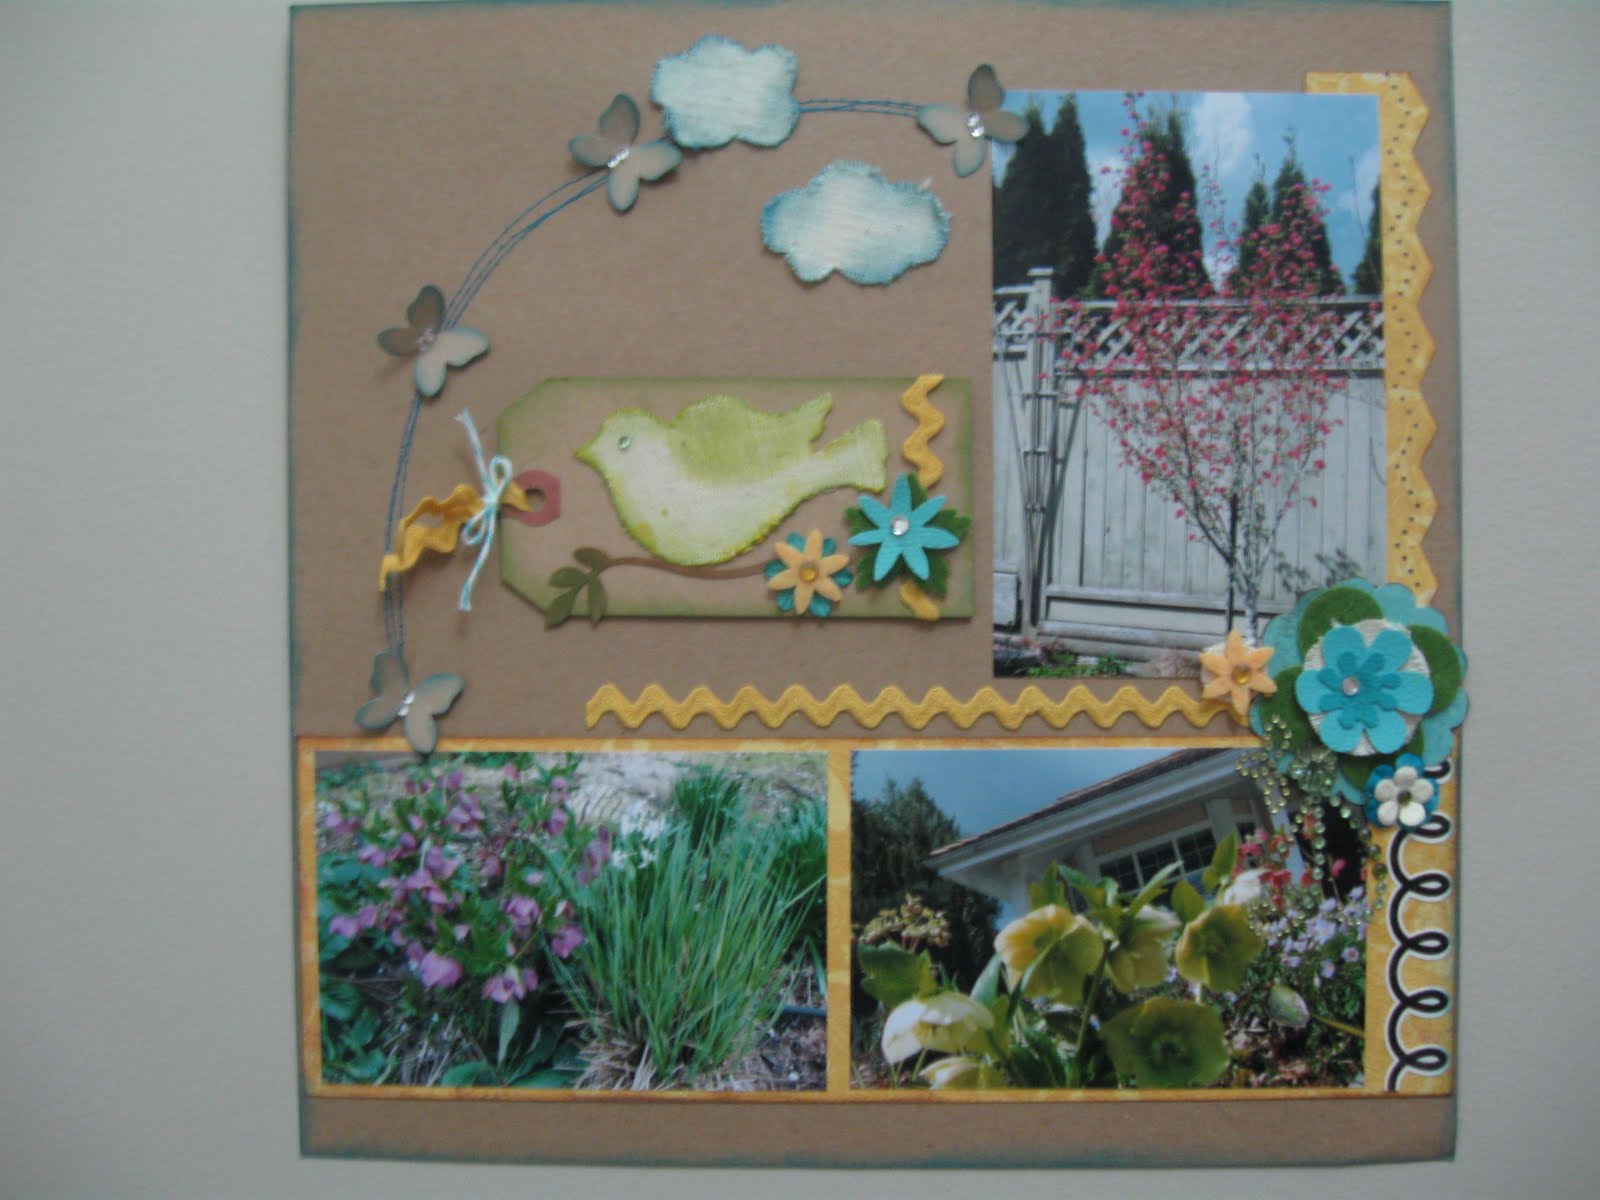
Here is my take on using fabric...The photos are of my garden finally breaking into bloom in mid April.
I appologize for the blurry photos of my layouts. The actual pictures on the layouts are in focus as DH is the normal photographer. I took these and I think it will be the last time I do that!!!!
I used canvas instead of gunnysack as I already had some canvas on hand. I chose to ink up the edges of my canvas to give it a little colour. The clouds, parts of the flowers and my bird are all done from canvas. I freehand cut that canvas bird on the Kraft tag...I kind of frayed the edges with my fingers just so it looked a little old and worn!
I used sketch #150 from Creative Scrappers as further inspiration for this layout. This was my first time to use a sketch... It really helped with all the decision making involved in completing the layout.
Another first for me was the machine stitching...I think I will be doing it again! I scrap lifted the idea of the butterflies on the stitching from Jody Rogers who is on the design team for Creative Scrappers.
Hope you enjoy this first layout that I have ever posted on my blog!
Next on the blog hop is Bethany at http://inspiredscrapper-bethany.blogspot.com/
Thank you for taking a look at my blog!
Monday, 18 April 2011
April Counterfeit Kit - Project 1 - Tags
I also made up some journalling spots...can you tell I like Kraft paper?
April Counterfeit Kit Challenge
The Counterfeit Kit Challenge unveiled the new April Kit...A Little Birdie Told Me...from Front Porch Kits. Lucky we are only counterfeiting this kit as they are sold out already!
Here is my version of the kit...I had to buy a couple of the For The Record pages this month. I still plan to punch, stamp and embellish tags from the cardstock colours.
Usually I know exactly what I will use the kit for...this time I have no idea! Will have to sort thru my pictures and see what jumps out at me. I love the colours of this kit. I have wanted to try these colour combos for a while so should be fun.
I was out at the building supply store and saw the Canadian Cancer Society's daffodil sale. I picked up some for layouts of my dear MIL and my uncle who both passed away from cancer. Added a couple of blue flowers from my stash to go with them and made a couple of extra yellow flowers by pulling apart silk flower bushes from dollarama. The little white and blue brad you can see below the yellow flowers are cloud brads...I just know they will come in handy!
Here is my version of the kit...I had to buy a couple of the For The Record pages this month. I still plan to punch, stamp and embellish tags from the cardstock colours.
Usually I know exactly what I will use the kit for...this time I have no idea! Will have to sort thru my pictures and see what jumps out at me. I love the colours of this kit. I have wanted to try these colour combos for a while so should be fun.
I was out at the building supply store and saw the Canadian Cancer Society's daffodil sale. I picked up some for layouts of my dear MIL and my uncle who both passed away from cancer. Added a couple of blue flowers from my stash to go with them and made a couple of extra yellow flowers by pulling apart silk flower bushes from dollarama. The little white and blue brad you can see below the yellow flowers are cloud brads...I just know they will come in handy!
Thursday, 31 March 2011
Babbling brooks and fishing tales- March Counterfeit Kit add-on Updated embellies
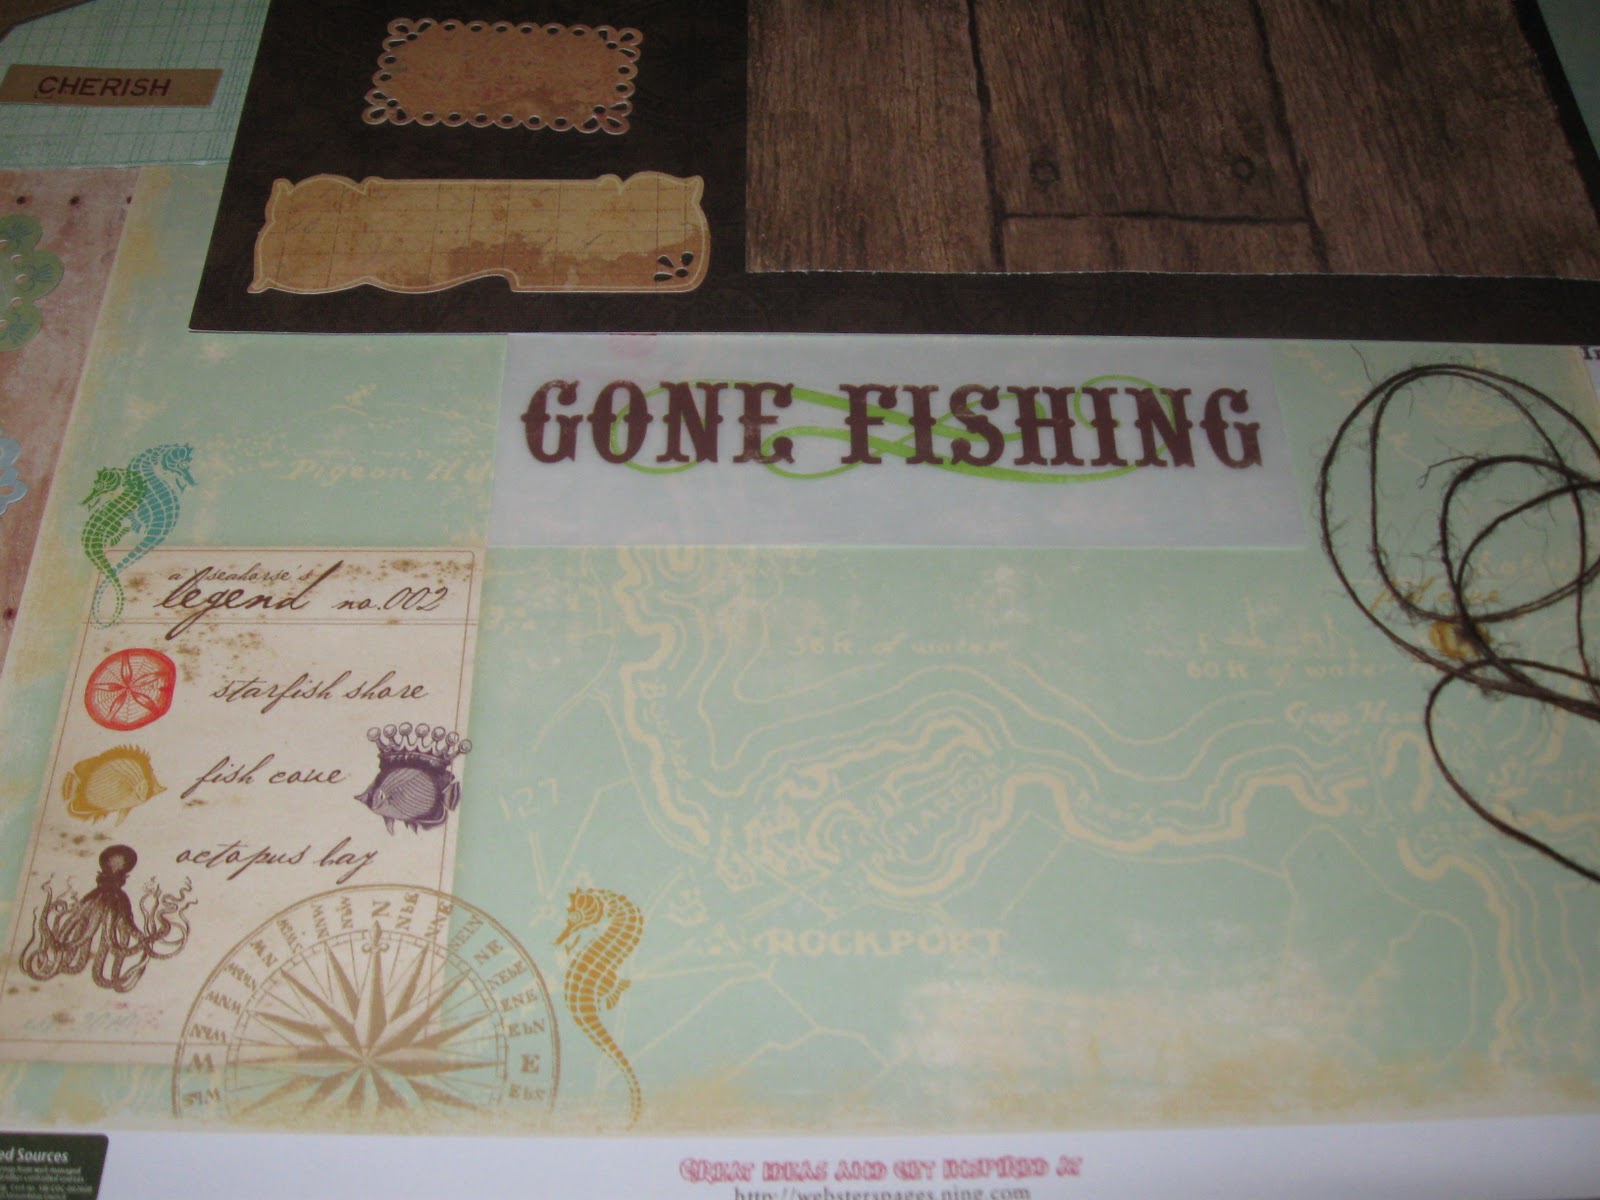
Babbling brooks lead to dreams of rainbow trout, steelhead, sockeye salmon...DH loves to fish and go boating. My "In The Woods" Kit will be used for our times in the woods up at the lake. I have 3 years of boating photos taken in the old boat to catch up on (YIKES!!!). The new boat will be delivered this month. I think it about time to get the old ones into layouts.
Last year DH and SIL caught a huge rainbow trout. ..I think it was 27 inches. I will imortalize those fish photos into layouts with this add-on. We have a photo of the fish beside a tape measure, I think I will use the little blue grid flags to record the weight and length. I am really looking forward to scrapping with this kit.
Still having camera card troubles...will post the fishing embellishments tomorrow after yet another trip back to the camera store
*****Finally******The Fishing/Boating Embellies for my Kit...
Subscribe to:
Posts (Atom)